
Installing a smart thermostat in your detached garage is a smart move to boost energy efficiency, control temperature precisely, and save on costs. First, verify its compatibility with your HVAC system. Turn off the power, remove the old thermostat, and carefully connect the wires to the new device following the manufacturer’s instructions. Mount it securely, restore power, and set up Wi-Fi access for remote control. If you keep going, you’ll discover how to optimize your system for maximum comfort and savings.
Key Takeaways
- Verify garage HVAC system compatibility before purchasing a smart thermostat to ensure seamless integration.
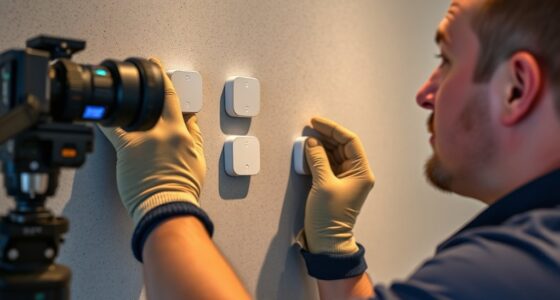
- Turn off power and carefully remove the old thermostat, noting existing wiring connections.
- Properly wire the new smart thermostat according to manufacturer instructions for reliable operation.
- Mount the device securely, then connect to Wi-Fi and configure settings via app or display.
- Use app features to schedule, monitor energy usage, and optimize garage temperature for efficiency.

Installing a smart thermostat is a straightforward process that can considerably improve your home’s energy efficiency and comfort. When you set out to upgrade your detached garage with a smart thermostat, the first step is understanding how it can help you save energy and reduce costs. These devices allow you to better control your garage’s temperature, guaranteeing you’re not wasting energy keeping it too warm or too cold when you’re not around. To maximize these benefits, you need to perform compatibility checks before purchasing or installing the device. Not all smart thermostats work with every heating or cooling system, so verifying compatibility with your garage’s existing setup is vital. This step guarantees seamless integration and prevents potential technical issues down the line.
Once you’ve selected a compatible model, installing your smart thermostat becomes a manageable task. Start by turning off the power to your heating and cooling system to guarantee safety. Remove the old thermostat, being careful to note how the wires are connected. Many smart thermostats come with detailed instructions and wiring diagrams, which help you identify the correct terminals for your system. During installation, you’ll connect the wires from your garage’s HVAC system to the new device, following the compatibility check results and manufacturer instructions. Proper wiring is essential for reliable operation and energy savings, so take your time and double-check your connections before powering everything back on.
Select a compatible model, turn off power, remove the old thermostat, and carefully connect the wires following instructions.
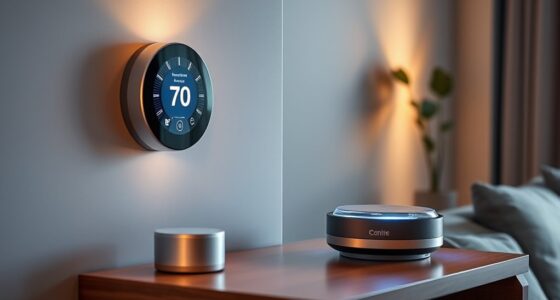
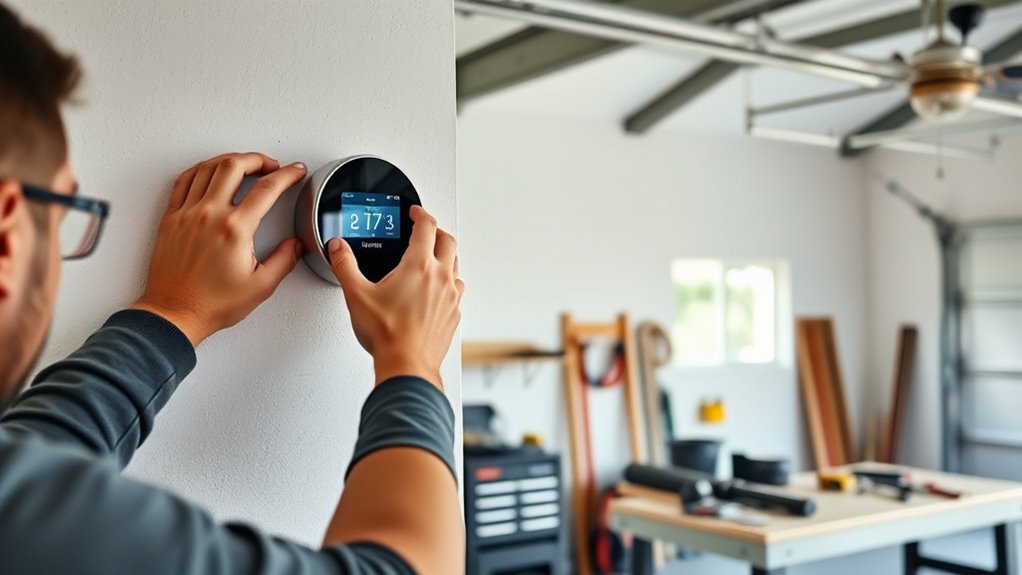
Next, mount the thermostat on the wall, making sure it’s level and securely attached. Once installed physically, turn the power back on and follow the setup instructions provided by the thermostat’s app or display. You’ll typically connect the device to your Wi-Fi network, allowing you to control it remotely. This connectivity is key to maximizing energy savings, as you can adjust the temperature from anywhere and set schedules that align with your garage’s usage patterns. Many models also offer learning capabilities, which adapt to your preferences over time, further optimizing efficiency. Additionally, understanding the importance of color accuracy in the display can enhance your user experience by providing clear and accurate information.
After setup, spend a few moments exploring the app or control interface to familiarize yourself with features like temperature scheduling, notifications, and energy reports. These tools empower you to fine-tune your garage’s climate and monitor your energy consumption, guaranteeing you’re making the most of your smart thermostat. With your device properly installed and configured, you’ll enjoy better temperature regulation, increased energy savings, and a more comfortable garage environment. The effort you put into compatibility checks and precise wiring pays off through reliable operation and significant long-term benefits in efficiency and convenience.

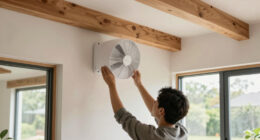
Quietcool QC CL-7000 RF Classic Advanced Whole House Fan with Wireless Control - Up to 6924 CFM - Two Speed - Covers up to 3,462 SQFT - 10 Year Warranty - Removable Grille
QuietCool advanced whole house fans use and improve upon the principle of ventilation cooling with savings off traditional...
As an affiliate, we earn on qualifying purchases.
Frequently Asked Questions
Can Smart Thermostats Be Used Without Wi-Fi?
Smart thermostats generally rely on Wi-Fi for full functionality, so they can’t operate with offline functionality in most cases. Without Wi-Fi, you might lose remote control and some smart features, but basic temperature control can still work if your thermostat has a local control option. Keep in mind, Wi-Fi dependency limits offline operation, so check your specific model’s capabilities if you want offline functionality in your detached garage.
Are There Specific Models Recommended for Detached Garages?
Think of choosing a smart thermostat like picking the right pair of shoes for a hike—you need durability and comfort. For detached garages, look for models like the Nest Learning Thermostat or Ecobee SmartThermostat, known for compatibility with various heating systems and robust Wi-Fi connectivity. Make sure your garage is well-insulated; good insulation enhances thermostat efficiency, preventing temperature swings and saving energy.
How Do Smart Thermostats Handle Extreme Temperature Fluctuations?
Smart thermostats handle extreme temperature fluctuations by using accurate temperature sensors to monitor your garage’s environment constantly. They adjust heating or cooling accordingly, ensuring consistent comfort. Additionally, many models come with a power backup, so they keep functioning during power outages. This combination helps maintain a stable temperature even when outside conditions change rapidly, giving you peace of mind and protecting your garage space effectively.
Is Professional Installation Necessary for Smart Thermostats?
You can do a DIY installation of your smart thermostat, but professional setup might be worth it to avoid voiding warranty considerations. It’s a coincidence that many smart thermostats are designed for easy installation, yet some detached garages have unique wiring or insulation challenges. If you’re comfortable with basic electrical work, you might handle it yourself, but consulting a professional guarantees proper setup and preserves your warranty.
Can Smart Thermostats Integrate With Existing Home Security Systems?
Yes, smart thermostats can integrate with your existing home security system, enhancing your home automation. This integration allows you to control your climate remotely and set schedules, which can lead to significant energy savings. You’ll enjoy a more seamless smart home experience, as your security system and thermostats work together to optimize comfort and efficiency. Just make sure your devices are compatible, and you’ll maximize the benefits of your smart home setup.

Quietcool QC CL-4700 RF Classic Advanced Whole House Fan with Wireless Control - Up to 4415 CFM - Two Speed - Covers up to 2,208 SQFT - 10 Year Warranty - Removable Grille
QuietCool advanced whole house fans use and improve upon the principle of ventilation cooling with savings off traditional...
As an affiliate, we earn on qualifying purchases.
Conclusion
Installing a smart thermostat in your detached garage is like giving it a heartbeat—bringing comfort and efficiency right to its door. With simple steps and a little know-how, you can transform your chilly or stuffy space into a cozy retreat or a functional workspace. Don’t let your garage be an outsider; make it part of your smart home family. After all, isn’t it time your garage got the upgrade it deserves?
Quietcool QC CL-3100 RF Classic Advanced Whole House Fan with Wireless Control - Up to 3126 CFM - Two Speed - Covers up to 1,608 SQFT - 10 Year Warranty - Removable Grille
QuietCool advanced whole house fans use and improve upon the principle of ventilation cooling with savings off traditional...
As an affiliate, we earn on qualifying purchases.
QuietCool QC CL-6000 RF Classic Advanced Whole House Fan with Wireless Control - Up to 5665 CFM - Two Speed - Covers up to 2,833 SQFT - 10 Year Warranty - Removable Grille
QuietCool advanced whole house fans use and improve upon the principle of ventilation cooling off traditional cooling methods...
As an affiliate, we earn on qualifying purchases.