To install remote sensors for your smart thermostat, choose spots away from heat sources or drafts, like direct sunlight or vents. Place sensors at eye level in central areas that reflect common activity zones. Make certain they’re within range of your hub, avoiding obstacles like furniture or thick walls. Test the connection and adjust the placement if needed. If you keep an eye on these tips, you’ll improve comfort and efficiency—more details await you.
Key Takeaways
- Place sensors in central locations away from heat sources and drafts for accurate temperature readings.
- Ensure sensors are at eye level and not obstructed by furniture or walls.
- Test signal strength after installation and reposition sensors closer to the hub if needed.
- Avoid placing sensors near appliances, electronics, or large metal objects that can interfere with communication.
- Regularly verify sensor data and adjust placement to maintain reliable, consistent temperature monitoring.

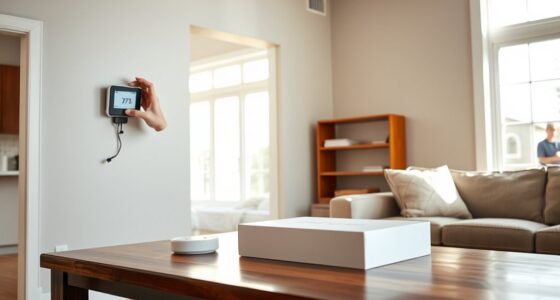
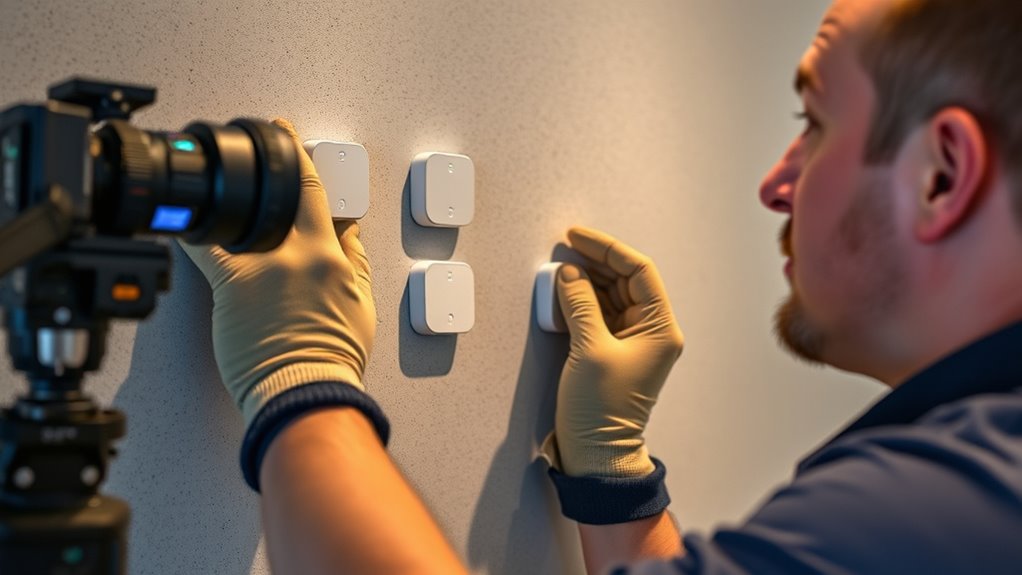
Installing remote sensors for your smart thermostat can greatly enhance your home’s comfort and energy efficiency. These sensors help the thermostat accurately assess the temperature in different rooms, ensuring consistent comfort throughout your house. To maximize their effectiveness, you need to pay close attention to sensor placement and signal range. Proper placement ensures the sensors accurately reflect the temperature where you spend your time, while good signal range guarantees reliable communication between sensors and the thermostat.
Start by identifying the areas where temperature consistency matters most—living rooms, bedrooms, or home offices. Avoid placing sensors near heat sources like radiators, direct sunlight, or drafts from windows and doors, as these can skew readings. Instead, position sensors at about eye level, away from walls or furniture that might block airflow. This placement ensures the sensor captures a true representation of the room’s temperature, allowing your thermostat to adjust heating or cooling accordingly. Remember, the goal is to locate sensors in central spots that reflect the usual activity zones, not in corners or secluded areas where they might give misleading data.
Next, consider the sensor’s signal range. Most remote sensors operate on wireless protocols like Zigbee or Z-Wave, which have specific ranges. Check your sensor’s specifications to understand its effective signal range, typically between 30 to 100 feet indoors, depending on walls and obstacles. If your house has multiple floors or thick walls, you might need to position sensors closer to the thermostat or consider using range extenders. Ensuring a strong, stable connection prevents dropouts or inaccurate readings, which can compromise your system’s efficiency. Understanding home automation protocols can help you optimize communication and sensor placement for better performance.
Test the signal strength after placing the sensors. Many smart thermostats offer apps or interfaces that show connection status. If a sensor’s signal is weak, try relocating it closer to the main hub or adjusting its height. Avoid placing sensors behind large metal objects, appliances, or near electronic devices that could interfere with wireless signals. An ideal setup involves placing sensors where they can communicate reliably without interruptions, providing consistent temperature data to your thermostat.

Honeywell Home T9 WiFi Smart Thermostat with 1 Smart Room Sensor, Touchscreen Display, White
SAVE MONEY AND ENERGY. Adjust your ENERGY STAR certified thermostat from anywhere with your mobile device, or let…
As an affiliate, we earn on qualifying purchases.
As an affiliate, we earn on qualifying purchases.
Frequently Asked Questions
Can Remote Sensors Be Used With All Smart Thermostat Brands?
Not all smart thermostats are compatible with remote sensors, but many popular brands do support them. You’ll need to follow the installation guidelines carefully to guarantee proper sensor calibration and functionality. Check your thermostat’s compatibility list and manufacturer instructions, as some models may require specific sensors or hubs. Always verify compatibility before purchase to avoid issues, and follow the setup steps to get accurate temperature readings for ideal comfort and efficiency.
How Do Remote Sensors Impact Energy Savings?
You might think remote sensors are just fancy gadgets, but they actually boost your energy savings surprisingly well. By improving sensor calibration and using proper installation techniques, they help your thermostat respond accurately to room conditions. This means less wasted energy and lower bills. So, while it seems simple, integrating sensors effectively guarantees your system runs efficiently, proving that a small upgrade can make a big difference in your home’s energy management.
Are Remote Sensors Compatible With Existing HVAC Systems?
Yes, remote sensors are generally compatible with existing HVAC systems if you follow the proper installation guidelines. You’ll need to verify sensor calibration aligns with your thermostat’s settings to optimize performance. Check your system’s compatibility and manufacturer instructions before installation. By adhering to these guidelines, you can seamlessly integrate remote sensors, enhancing comfort and energy savings without needing to replace your current HVAC setup.
What Is the Maximum Range for Remote Sensors?
The maximum range for remote sensors typically falls between 50 to 300 feet, depending on the model. You should consider sensor placement carefully, avoiding walls or obstacles that could weaken the signal. Keep in mind that signal interference from other electronic devices or thick building materials can also diminish the effective range, so test the connection in your space to ensure reliable communication with your smart thermostat.
Do Remote Sensors Require Wi-Fi or Internet Connection?
Think of remote sensors as quiet messengers in your home’s energy harmony. They don’t require Wi-Fi or internet connection to function, relying instead on wireless connectivity like Zigbee or Z-Wave. Proper sensor placement guarantees they communicate effectively, whispering temperature updates to your thermostat. As long as they’re within their network range, these sensors work seamlessly, helping you maintain comfort without the need for constant internet access.
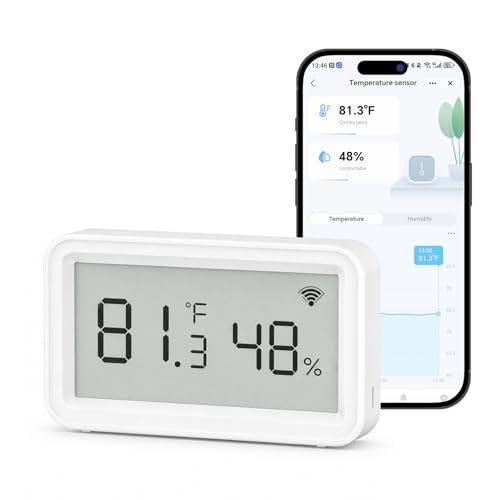
eMylo Smart WiFi Thermometer Hygrometer, Indoor Wireless Temperature Humidity Sensor with Electronic Display, App Notification Alert, Free Data Storage Export, Digital Remote Monitor for Home Room (1)
Remote WiFi Monitoring – Anytime, Anywhere Track real-time temperature and humidity through the Smart Life/Tuya app over 2.4GHz…
As an affiliate, we earn on qualifying purchases.
As an affiliate, we earn on qualifying purchases.
Conclusion
By installing remote sensors, you can optimize your home’s comfort and energy efficiency. Imagine a family in Minnesota who installed sensors in their bedrooms—now, their smart thermostat adjusts based on room occupancy, saving on energy bills while keeping everyone comfortable. With simple installation and smart placement, you’ll enjoy personalized climate control that adapts to your daily routines. Take control of your home’s comfort today and experience the benefits of a smarter, more efficient system.

SONOFF SNZB-02P Zigbee Temperature Humidity Sensor, Indoor Thermometer Hygrometer with Alert, Works with Alexa & Google Home for Remote Monitoring and Home Automation, ZigBee 3.0 Hub Required (1)
Note: SNZB-02P needs to be used with Zigbee Hub
As an affiliate, we earn on qualifying purchases.
As an affiliate, we earn on qualifying purchases.

YoLink Smart Freezer Thermometer, LoRa Wireless Fridge Temperature Sensor 3-Pack, Ideal for Refrigerator, Freezer, Greenhouse, Pet Cage, App & SMS Alerts, 5-Year Battery, Hub Included
LORA > WIFI! YoLink devices don’t use your WiFi, ensuring no crowding or slowing down of your network….
As an affiliate, we earn on qualifying purchases.
As an affiliate, we earn on qualifying purchases.