To prepare your home for smart thermostat installation, start by checking your WiFi connection for stability and speed to guarantee reliable remote access. Evaluate your HVAC system to confirm compatibility and verify if you have a C-wire for continuous power; if not, consider wiring options or choosing a model that doesn’t need one. Pick a central, draft-free spot for the thermostat to get accurate readings. Continue exploring for detailed tips to make the process smooth.
Key Takeaways
- Ensure your WiFi network is stable and has sufficient bandwidth for reliable smart thermostat operation.
- Verify your HVAC system’s compatibility and identify wiring or communication requirements before installation.
- Turn off power and document existing wiring connections to facilitate correct setup of the new thermostat.
- Check for a C-wire or plan alternatives if your thermostat needs continuous power during installation.
- Choose an optimal location away from direct sunlight, drafts, or heat sources for accurate temperature sensing.

Installing a smart thermostat can substantially improve your home’s comfort and energy efficiency, but proper preparation is key to a smooth setup. Before you start, you need to verify your WiFi compatibility. Most smart thermostats rely on a strong, stable WiFi connection to function properly, allowing you to control your system remotely and access advanced features. Check your home’s WiFi network to confirm it’s stable and has sufficient bandwidth. If your network is weak or unreliable, consider upgrading your router or moving it closer to where you’ll install the thermostat. A reliable WiFi connection prevents frustrating disconnections and ensures your smart device performs as intended.
Next, you should evaluate your HVAC system types. Different systems—such as central air, heat pumps, or ductless mini-splits—may require specific thermostat models or additional wiring. Not all smart thermostats are compatible with every HVAC system, so reviewing your system’s specifications is essential. For example, some older systems might lack the necessary wiring or communication protocols, making them incompatible without extra components or professional upgrades. Understanding your HVAC configuration helps you select a compatible thermostat that integrates seamlessly, avoiding costly errors or incomplete functionality.
Evaluating your HVAC system type ensures compatibility and seamless integration with your smart thermostat.
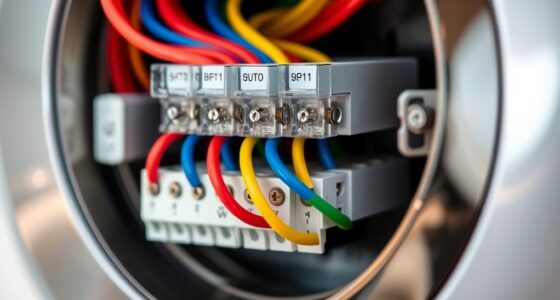
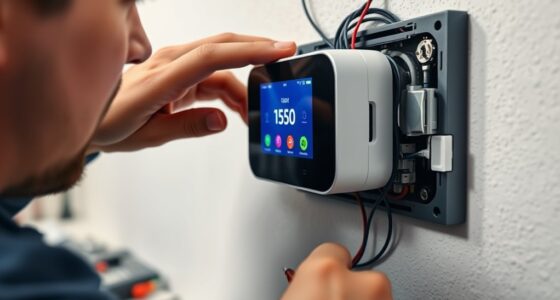
Additionally, you should turn off power to your HVAC system before beginning installation. This step prevents electrical shocks and protects your equipment. Once power is off, remove your existing thermostat carefully, noting how the wiring connects. Taking photos of the wiring setup can be helpful when installing the new device. During this process, pay attention to the wiring labels and colors, as they often indicate which wire connects to each terminal. This preparation ensures you’ll reconnect everything correctly during installation, saving you time and preventing potential system malfunctions.
You’ll also want to verify whether your existing wiring includes a common wire (C-wire). Many smart thermostats require a C-wire for continuous power supply, especially if they have a display or WiFi module. If your current setup lacks a C-wire, you may need to run a new wire or choose a model that doesn’t require one. Some thermostats come with power-stealing technology that can work without a C-wire, but reliability varies. Ensuring you understand your wiring setup beforehand helps you avoid surprises during installation and reduces the need for additional work later.
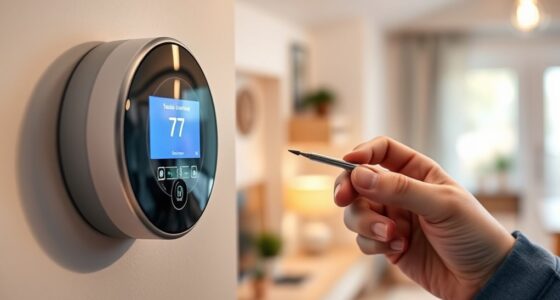
Finally, consider your home’s layout and placement. The location of your thermostat affects its ability to accurately read temperatures and operate efficiently. Install it in a central location away from direct sunlight, drafts, or heat sources like appliances or vents. Proper placement ensures your smart thermostat can optimize your HVAC system effectively, providing maximum comfort and energy savings. Additionally, high-quality projectors with precise contrast ratios can be used to enhance your home theater experience, making your space more enjoyable for entertainment. By taking these preparatory steps—checking WiFi compatibility, understanding your HVAC system type, securing power, and assessing wiring—you set the stage for a successful, hassle-free installation.
Frequently Asked Questions
Can I Install a Smart Thermostat Myself or Should I Hire a Professional?
You can do a DIY installation if you’re comfortable with basic wiring and tech setups, but hiring a professional is often safer and guarantees proper setup. DIY installation can save money and be quick, but a professional ensures the job’s done right, avoiding potential issues. If you’re unsure about wiring or compatibility, it’s better to opt for professional installation to guarantee safety and peak performance.
Will My Existing HVAC System Be Compatible With a Smart Thermostat?
Before you begin installing a smart thermostat, remember that while it’s not quite a rocket science, you’ll want to check HVAC compatibility first. Your existing system’s wiring requirements and compatibility with smart thermostats vary, so review your system’s specifications carefully. Most modern systems are compatible, but older or specialized setups might need an upgrade or professional help. Ensuring compatibility prevents surprises and makes installation smoother.
How Do I Ensure Wi-Fi Connectivity for My Smart Thermostat?
To guarantee Wi-Fi connectivity for your smart thermostat, make sure your Wi-Fi signal is strong in its location. Keep your router close or consider a Wi-Fi extender if needed. Check your network speed; a stable, high-speed connection prevents disruptions. Avoid placing the thermostat near metal objects or electronic devices that can interfere with the signal. Regularly update your router’s firmware for peak performance and reliable connectivity.
What Safety Precautions Should I Take Before Installation?
Before beginning, be vigilant about voltage and vulnerability. Turn off the power supply at the circuit breaker to prevent potential shocks, and double-check electrical safety. Keep tools and wires organized to avoid accidents, and verify your home’s wiring is compatible. Remember, circuit breaker awareness protects you from electrical emergencies. Take these precautions, and you’ll safely set the stage for a smooth, secure smart thermostat installation.
How Long Does the Installation Process Typically Take?
The installation timeline for a smart thermostat typically takes about 1 to 2 hours, depending on your home’s wiring and your comfort with DIY projects. Preparation steps, like turning off power and removing existing units, help speed up the process. You should set aside enough time, follow the manufacturer’s instructions carefully, and guarantee all safety precautions are in place to make installation smooth and efficient.
Conclusion
Once you’ve prepared your home, installing a smart thermostat becomes smooth sailing. Imagine switching on your new device and immediately enjoying personalized comfort and energy savings. For example, Sarah installed her smart thermostat last weekend and now effortlessly adjusts her home’s temperature from her phone, even when she’s at work. Taking these simple steps guarantees your upgrade goes seamlessly, so you can start enjoying the convenience and savings right away. Your smarter, more comfortable home is just a setup away!