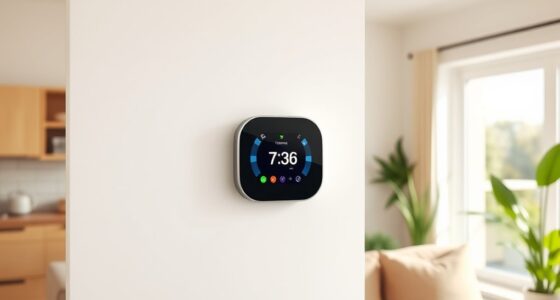
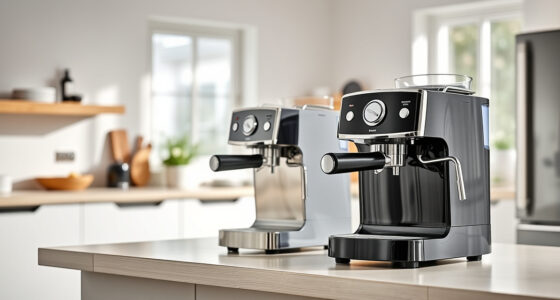
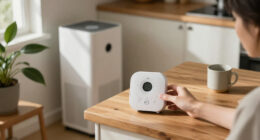
Set up a smart thermostat to control a compatible home heating and cooling system from its screen or a phone app, and to follow a schedule you choose. This guide is for homeowners and renters with permission to change the thermostat who can safely work with low-voltage wiring. Allow 1-2 hours, including compatibility checks and system testing; installation time varies by thermostat and wiring.

Get home appliances delivered free with Prime
- Fast, free delivery on millions of items
- Prime Video, Amazon Music and more included
- Member-only deals all year

Sensi ST55 Smart Wi-Fi Thermostat
- ✔ Model: ST55
- ✔ Compatible systems: Air conditioner, boiler, furnace, and heat pump
- ✔ Smart home platforms: Amazon Alexa, Apple HomeKit, Google Assistant, SmartThings, Vera
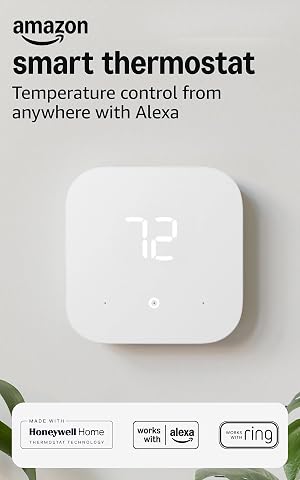
Amazon Smart Thermostat with Alexa and Ring Compatibility
- ✔ Model: S6ED3R
- ✔ Dimensions: 3.56 x 3.56 x 0.84 in
- ✔ Compatible systems: Most 24V systems, including forced-air, heat pump, and radiant boiler

Honeywell Home RTH9585WF1004 Wi-Fi Smart Color Thermostat
- ✔ Model: RTH9585WF1004
- ✔ Display: Customizable color touchscreen
- ✔ Compatible systems: Compatible forced-air, hot water, steam, and heat pumps with electric backup
Difficulty: Intermediate | Time: 1-2 hours
What You’ll Need
Tools & Materials:
- Smart thermostat and its installation parts
- Phone or tablet with the thermostat maker’s app
- Small screwdriver
- Labels or masking tape and a pen
- Camera for recording existing wiring
- Home Wi-Fi details
Knowledge:
- Basic comfort using a screwdriver
- Ability to identify the heating and cooling equipment type from its label or documentation
Check the thermostat maker’s compatibility checker before buying. Confirm the model supports your equipment, such as a heat pump, boiler, multistage system, or central air conditioning. Check whether a C wire is required or whether the package includes an approved adapter. If you rent, get permission before removing the existing thermostat.
Sensi ST55 Smart Wi-Fi Thermostat
For a home that needs a smart thermostat to fit into an existing mix of devices, Sensi ST55 is the most balanced choice in this lineup. It works with Alexa, Apple HomeKit, Google Assistant, SmartThings, and Vera, giving households more freedom to choose their preferred control system than the Amazon model, which is centered on Alexa and Ring. That flexibility is especially useful if family members use different phone ecosystems or if the home’s automation setup changes over time.Installation is another reason Sensi takes the lead. Its app provides step-by-step instructions and a built-in level, while a common wire is unnecessary in most installations. That can make replacing a conventional thermostat more approachable, although some systems still require a common wire and the available information does not confirm compatibility with every HVAC setup. The button-based, traditional thermostat shape also makes it familiar for people who want app access without relying on a large touchscreen like Honeywell’s.Scheduling, remote access, usage reports, alerts, and maintenance reminders cover the practical jobs many households want from a connected thermostat. The tradeoff is that Sensi’s description offers less emphasis on automatic presence-based adjustments than Amazon’s model, and less display-focused information than Honeywell’s color screen. We’d choose it for versatility and installation flexibility, after checking the system and wiring; we’d skip it if the home needs richer built-in visual feedback or confirmed compatibility with an unusual HVAC configuration.
Pros:
- Works with Alexa, Apple HomeKit, Google Assistant, SmartThings, and Vera.
- App-guided installation includes a built-in level.
- Common wire is not required in most installations.
- Includes scheduling, remote access, usage reports, alerts, and maintenance reminders.
Cons:
- A common wire may still be needed for some installations.
- Compatibility is not specified for every HVAC system.
- Its traditional LED and button design offers less visual detail than Honeywell’s color touchscreen.
Best for: Households that want broad smart home platform support and a guided DIY installation, especially when a C-wire may not be available.
Not ideal for: Buyers who want a large color touchscreen, or anyone whose HVAC setup requires compatibility confirmation beyond the listed systems.
Bottom line: Sensi ST55 is our strongest all-around home pick for its mix of broad smart home support and more forgiving wiring requirements.
“Sensi ST55 is our strongest all-around home pick for its mix of broad smart home support and more forgiving wiring requirements.”
Amazon Smart Thermostat with Alexa and Ring Compatibility
When Alexa is already the center of a home’s connected devices, the Amazon Smart Thermostat offers a direct route from voice routines to heating and cooling. It supports app and touch-button controls as well as voice commands through a separate compatible Alexa-enabled device. Its ability to adjust temperatures based on routines or presence gives it a distinct role beside Sensi: Sensi spans more platforms, while Amazon is more tailored to households that want Alexa-driven automation.Scheduling, vacation mode, emergency heat mode, and indoor humidity sensing make the feature set relevant to everyday home comfort. Humidity information can add context when a room feels uncomfortable, while vacation and emergency heat settings give users dedicated options for particular situations. It is compatible with many 24V systems, including conventional forced-air, heat pump, and radiant boiler systems, and it carries ENERGY STAR and ECOLOGO Gold certifications.The wiring and network limits need attention before buying. This thermostat requires a C-wire or a separately sold power adapter kit, so it is less forgiving than Sensi in homes without a common wire. It uses 2.4 GHz Wi-Fi only, and voice control depends on another Alexa device. Like the other picks, it does not support 110–240V electric baseboard systems. This is the focused choice for Alexa routines; households using HomeKit or Google Assistant should favor Sensi, while buyers who want a vivid built-in display may prefer Honeywell.
Pros:
- Supports Alexa app, compatible Alexa voice control, and touch buttons.
- Can adjust temperature based on routines or presence.
- Includes schedules, humidity sensing, vacation mode, and emergency heat mode.
- Compatible with many 24V conventional, heat pump, and radiant boiler systems.
Cons:
- Requires a C-wire or separately sold power adapter kit.
- Voice control requires a separate Alexa-enabled device.
- Wi-Fi is limited to 2.4 GHz, and 110–240V electric baseboard systems are unsupported.
Best for: Alexa households that want routine- or presence-based temperature adjustments and already have a compatible Alexa-enabled device for voice control.
Not ideal for: Homes without a C-wire or willingness to use the separate adapter, households on 5 GHz-only Wi-Fi, and users who rely on HomeKit or Google Assistant.
Bottom line: Choose Amazon Smart Thermostat when Alexa automation is the priority and the home’s wiring and 2.4 GHz network meet its requirements.
“Choose Amazon Smart Thermostat when Alexa automation is the priority and the home’s wiring and 2.4 GHz network meet its requirements.”
Honeywell Home RTH9585WF1004 Wi-Fi Smart Color Thermostat
Honeywell Home RTH9585WF is the display-first pick: its customizable color touchscreen puts schedules and thermostat controls directly on the wall, rather than making the mobile app the main place to manage them. For people who regularly adjust settings at the thermostat or want a more informative control panel in a shared household, this is a meaningful difference from the simpler Amazon buttons and Sensi’s traditional button-based layout.It also combines flexible temporary, permanent, and vacation holds with remote app access, Alexa and Google Home compatibility, energy reports, weather forecasts, and maintenance alerts. That makes it more informative at the thermostat than Amazon, while Sensi still has the edge for breadth of platform support because it also names Apple HomeKit, SmartThings, and Vera. Honeywell’s listed HVAC fit covers compatible forced-air, hot water, steam, and heat-pump systems with electric backup.The main constraint is wiring: a C-wire is required, including for heating-only oil furnace systems. It is also not compatible with electric baseboard heat, a limitation shared by the other two picks. We would choose this model when on-wall readability and a richer interface matter more than setup flexibility. Buyers without a C-wire should look first at Sensi, and those already committed to Alexa routines may get a more direct automation fit from Amazon.
Pros:
- Customizable color touchscreen provides a more visual on-wall control experience.
- Offers temporary, permanent, and vacation holds.
- Provides energy reports, weather forecasts, and maintenance alerts.
- Supports app control and Alexa or Google Home.
Cons:
- Requires a C-wire, including for heating-only oil furnace systems.
- Does not support electric baseboard heat.
- Named smart home compatibility is narrower than Sensi’s.
Best for: Households that want a customizable color touchscreen, flexible holds, and weather or maintenance information visible through a connected thermostat.
Not ideal for: Homes without a C-wire, electric baseboard heating systems, and users who want support for HomeKit, SmartThings, or Vera.
Bottom line: Honeywell Home RTH9585WF is the best match for a display-centered thermostat experience when the home has compatible wiring and HVAC equipment.
“Honeywell Home RTH9585WF is the best match for a display-centered thermostat experience when the home has compatible wiring and HVAC equipment.”
As an Amazon Associate we earn from qualifying purchases.
Before You Start
Read the thermostat and HVAC equipment instructions before touching any wires. Thermostat wires are usually low voltage, but wiring errors can damage equipment. Turn off power to the HVAC system at its breaker or service switch before removing the old thermostat. Do not work on exposed line-voltage wiring, such as wiring used by some electric baseboard heaters. Stop and contact a qualified HVAC professional if the system type or wiring is unclear, damaged, or incompatible.
Step-by-Step Instructions
Step 1: Confirm compatibility
Use the manufacturer’s compatibility checker with your HVAC system type and the labels on the existing thermostat wires. Remove the old thermostat’s front cover only if needed to read its labels; do not disconnect wires yet. Compare the result with the smart thermostat’s supported systems and power requirements.
Tip:Wire colors are not reliable identifiers. Use the letter printed beside each wire terminal, such as R, C, Y, W, G, or O/B.
Check: The checker confirms that the thermostat supports your equipment and explains any required C wire or adapter.
Step 2: Gather the parts and record the wiring
Unpack the thermostat and confirm that the backplate, screws, labels, and any power adapter are present. Take a clear photo of the existing thermostat terminals and wire labels. If the wires are not already labeled, mark each one with its terminal letter before disconnecting anything.
Tip:Keep the photo available during installation. Do not rely on memory or wire color when moving wires.
Check: You have a legible photo and each wire can be matched to its original terminal.
Step 3: Turn off HVAC power
Switch off the HVAC system at its breaker or service switch. Use the old thermostat to call for heating or cooling before switching power off if you want to confirm which equipment it controls. After the power is off, wait for the system to stop and the thermostat screen to go blank.
Tip:If the old thermostat stays powered by batteries, a lit screen does not prove the HVAC power is on. Do not touch bare wire ends; keep them separated so they cannot fall back into the wall.
Check: The heating or cooling equipment has stopped, and the wires are accessible without power to the system.
Step 4: Remove the old thermostat
Pull the old thermostat faceplate away from its base. Photograph the labeled terminals again if the wires are now easier to see. Disconnect one wire at a time, keep its label attached, and gently secure the loose wires so they cannot slip into the wall. Remove the old baseplate screws.
Tip:Do not disconnect a wire until its terminal label is recorded. If a wire slips into the wall, avoid pulling hard; retrieve it carefully or call an installer.
Check: The old unit is removed, and every wire remains labeled and reachable.
Step 5: Mount the new backplate and connect wires
Feed the wires through the new backplate and fasten it to the wall, using the supplied anchors if needed. Connect each labeled wire to the matching terminal shown in the thermostat instructions. If the thermostat requires a C wire or adapter, install it exactly as the maker directs. Leave unused wires disconnected and secured unless the manual specifies otherwise.
Tip:Do not force a wire into a terminal or combine wires based on color. If the terminal labels do not match the old wiring or the instructions, stop and get professional help.
Check: The backplate sits securely, and each connected wire is fully seated in its specified terminal.
Step 6: Attach the thermostat and restore power
Fit the thermostat display onto the backplate as directed. Check that it sits flush and that no wire is trapped behind it. Restore power at the breaker or service switch. Wait for the thermostat to start; follow its prompts to select your language, equipment type, and any installer settings it requests.
Tip:If the thermostat remains blank, switch power off before checking connections. Do not repeatedly reset a system that trips its breaker.
Check: The display starts normally and shows setup prompts or the home screen without an error message.
Step 7: Connect the app and Wi-Fi
Install the thermostat maker’s app and sign in or create an account. Follow the app’s instructions to add the thermostat, scan its setup code if provided, and connect it to your home Wi-Fi. Use the network band and password supported by the model. Give the device a clear name, such as “Hallway,” if you have more than one thermostat.
Tip:Some models require a 2.4 GHz Wi-Fi network or a phone connected to the same network during setup. Check the product instructions if pairing fails.
Check: The app shows the thermostat as online and displays the current temperature or control screen.
Step 8: Set preferences and a schedule
Set the correct system mode, temperature units, date, time, and home or away preferences. Create a schedule that reflects when people are home and asleep, using comfortable temperatures that suit your household. Set vacation or away settings only if you want the thermostat to change temperatures when nobody is home.
Tip:Start with a simple schedule. You can adjust it after observing comfort and energy use; avoid extreme settings that make recovery slow or uncomfortable.
Check: The thermostat displays the correct time and mode, and the app shows the saved schedule.
Step 9: Test heating and cooling
Use the thermostat to call for heat, then call for cooling if your system has both. Set each test point a few degrees beyond the current room temperature and allow the system time to respond. Confirm the expected equipment starts and that air or heat comes from the correct vents or radiators. Return the thermostat to its normal setting after testing.
Tip:Many systems have a built-in delay before starting, especially when switching from cooling to heating. Follow the equipment manual’s timing guidance.
Check: Each available mode responds to its thermostat setting, the app reflects changes, and no system error appears.
Common Mistakes to Avoid
- Buying a thermostat before checking the HVAC system and wiring. — Run the manufacturer’s compatibility check first, including power requirements and support for heat pumps or multistage equipment.
- Connecting wires by color instead of terminal label. — Photograph the terminal letters and label wires before disconnecting them; match letters to the new thermostat instructions.
- Leaving HVAC power on during wiring. — Turn off the system at its breaker or service switch before removing or connecting wires.
- Assuming a blank display means the thermostat is defective. — Check power, wire seating, and any required C wire or adapter with power off before concluding the unit has failed.
Troubleshooting
Problem: The thermostat display stays blank after power is restored.
Solution: Switch off HVAC power. Check that the display is seated on the backplate and that the R and required C or adapter connections match the instructions. Restore power once. If it remains blank, contact the thermostat maker or an HVAC professional.
Problem: The thermostat will not connect to Wi-Fi.
Solution: Confirm the password, signal strength, and supported network band in the thermostat manual. Move the router or thermostat closer for setup, then retry pairing through the app.
Problem: Heating or cooling does not start during a test.
Solution: Check the selected system mode and setpoint, then wait for the system’s normal startup delay. If the setting is correct, switch off power and compare each wire connection with the original photo and wiring diagram. Call an HVAC professional if the wiring is uncertain.
Problem: The system runs the wrong mode or behaves unexpectedly.
Solution: Stop the test and review the equipment type and installer settings in the setup menu. Heat pumps and systems with an O/B terminal can require specific configuration. Use the wiring diagram or ask an HVAC professional to correct the setup.
What Success Looks Like
The thermostat is firmly mounted, starts without errors, appears online in its app, and follows the saved schedule. Heating and cooling modes that your home has respond to their settings, and the thermostat reports a plausible room temperature. Keep the old wiring photo and manuals for future service.
Next Steps
Check comfort and operation over the next few days. Adjust the schedule in small increments if rooms are too warm or cool at the times you use them. Review the app’s alerts and filter reminders, and replace HVAC filters on the equipment maker’s schedule. If temperatures remain inaccurate, the system short-cycles, or an error returns, record the message and contact the thermostat maker or a qualified HVAC professional.
Frequently Asked Questions
Do all smart thermostats need a C wire?
No. Requirements vary by model and HVAC system. Some thermostats work without a C wire; others need one or an approved adapter. Check the compatibility checker and installation instructions for your exact model.
Can I install a smart thermostat in a rental?
Only if your lease or landlord permits the change. Ask before removing the existing thermostat, and keep its parts and wiring records so the original unit can be restored if required.
How long should I wait for heating or cooling to start?
Startup time depends on the HVAC system. A brief delay is common, particularly after changing modes. Follow the equipment instructions; if the system does not respond after its stated delay, check the mode and wiring or contact a professional.
Can I install one on electric baseboard heating?
Only use a thermostat specifically rated for that system. Some baseboard thermostats use line voltage, which differs from common low-voltage HVAC wiring. Do not connect line-voltage wiring unless you are qualified to work on it.