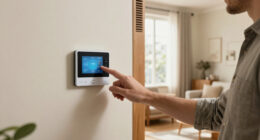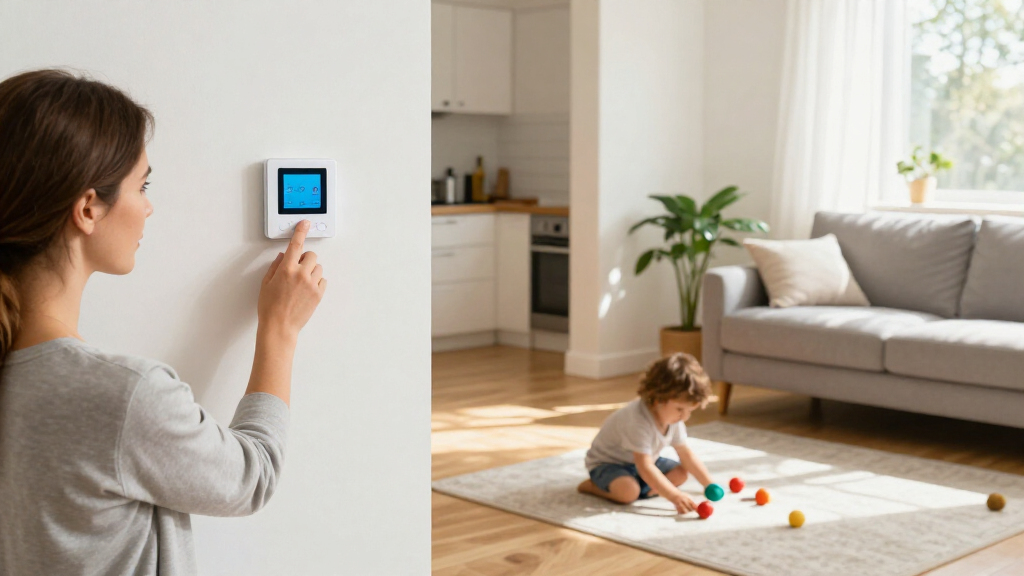
This guide walks homeowners through checking HVAC compatibility, replacing a standard thermostat with a smart Wi-Fi model, connecting it to an app, and testing its settings. It is for readers comfortable using a screwdriver and following wire labels; no electrical repair experience is assumed. Allow 1-2 hours, including setup and testing. Thermostat wiring carries low voltage, but work at the HVAC equipment can involve higher voltage. Stop and contact a qualified HVAC technician if the wiring or system does not match the instructions.

Get home appliances delivered free with Prime
- Fast, free delivery on millions of items
- Prime Video, Amazon Music and more included
- Member-only deals all year

Sensi ST55 Wi-Fi Smart Thermostat
- ✔ Connectivity: Wi-Fi
- ✔ Voice and platform support: Amazon Alexa, Apple HomeKit, Google Assistant, SmartThings, Vera
- ✔ HVAC compatibility: Air conditioner, boiler, furnace, heat pump

Honeywell Home X2S Smart Wi-Fi Thermostat
- ✔ Connectivity: Wi-Fi (2.4 GHz or 5 GHz) and Matter
- ✔ System compatibility: Up to 2 heat/2 cool conventional; up to 2 heat/1 cool heat pump with electric backup
- ✔ Power requirement: C-wire required; 24 VAC

Honeywell Home RTH9585WF1004 Wi-Fi Smart Color Thermostat
- ✔ Connectivity: Wi-Fi
- ✔ Programming: Seven-day programmable with flexible schedule options
- ✔ Compatible systems: Forced-air gas, oil, or electric; hot water and steam; heat pumps with electric backup
Difficulty: Intermediate | Time: 1-2 hours
What You’ll Need
Tools & Materials:
- Smart Wi-Fi thermostat compatible with your HVAC system
- Phone or tablet with the thermostat manufacturer’s app
- Small screwdriver
- Labels or masking tape and a pen
- Camera for recording existing wiring
- Drill and wall anchors if the new base needs different mounting holes
- Optional: digital multimeter, only if you know how to use it safely
Knowledge:
- Basic use of a screwdriver
- Ability to identify your HVAC system type from its manual or equipment label
- Ability to follow the thermostat manufacturer’s wiring diagram and app setup
Check the thermostat product’s compatibility tool before buying or starting. Common systems include conventional furnace-and-air-conditioner setups, heat pumps, and electric baseboard heat; one thermostat may not support all of them. Confirm whether the thermostat needs a C wire, also called a common wire, or includes an approved power adapter. Do not assume an unused wire is connected at the HVAC control board.
Read the thermostat installation manual and your HVAC equipment documentation. If you rent, get permission before changing installed equipment. Keep the old thermostat and its labeled wiring until the new one has passed testing.
Sensi ST55 Wi-Fi Smart Thermostat
The Sensi ST55 is our best overall pick because it balances app control with a comparatively approachable installation. In-app instructions and a built-in level help DIY owners get through mounting, while a C-wire is not required in many applications. That flexibility gives it an edge over both Honeywell options here, which explicitly require a C-wire. Since wiring needs still depend on the HVAC setup, we should check compatibility before starting.Once installed, the ST55 offers remote access, flexible schedules, usage reports, equipment alerts, and filter reminders. Its listed support for Alexa, Apple HomeKit, Google Assistant, SmartThings, and Vera is broader than the X2S’s major-platform list and the RTH9585WF’s Alexa and Google focus. That makes it a particularly adaptable choice for households with an established smart home setup. The tradeoff is that it lacks the RTH9585WF’s customizable color touchscreen, and broad compatibility does not mean every HVAC configuration will work.We would choose the Sensi when easy setup and platform flexibility matter more than an elaborate display or Matter certification. It is still essential to confirm the system type and wiring: “no C-wire required” applies to many applications, not every installation.
Pros:
- DIY installation guidance and built-in level
- C-wire is not required in many applications
- Supports several major voice assistants and smart home platforms
- Includes usage reports, equipment alerts, and filter reminders
Cons:
- C-wire needs vary by HVAC setup
- Compatibility is not universal across home heating and cooling systems
Best for: DIY-minded households that want app scheduling, broad voice-assistant support, and a chance of installing without a C-wire.
Not ideal for: Homes that need guaranteed compatibility without checking their HVAC wiring, or buyers who want a customizable color touchscreen or Matter certification.
Bottom line: Choose the Sensi ST55 for the most adaptable mix of DIY setup, remote scheduling, and smart home platform support in this group.
“Choose the Sensi ST55 for the most adaptable mix of DIY setup, remote scheduling, and smart home platform support in this group.”
Honeywell Home X2S Smart Wi-Fi Thermostat
If our home already uses a Matter-compatible setup, the Honeywell Home X2S is the most directly aligned pick. Matter certification, Wi-Fi, and support for Alexa, Google Assistant, and Apple HomeKit give it a clear connected-home role. Compared with the Sensi, its appeal is less about installation flexibility and more about a current interoperability standard. Compared with the RTH9585WF, it emphasizes smart home integration over a customizable color display.The X2S also provides auto-away, flexible scheduling, filter reminders, and an optional humidity display. Multiple programming patterns—including seven-day and weekday/weekend options—can suit different household routines. But its C-wire is required, so the ST55 is a stronger candidate for homes where wiring is uncertain or avoiding extra wiring work is a priority. Buyers should also verify that their system falls within its specified limits: up to two heat and two cool stages for conventional systems, or two heat and one cool stage for heat pumps with electric backup.We would skip this model for electric baseboard heat or a home without the required C-wire. For compatible systems, though, it offers a more Matter-centered choice than the Sensi and a more integration-focused alternative to the touchscreen-led RTH9585WF.
Pros:
- Matter-certified with support for Alexa, Google Assistant, and Apple HomeKit
- Offers auto-away and several scheduling patterns
- Optional indoor humidity display
- Provides filter reminders and demand response capability
Cons:
- Requires a C-wire
- Not compatible with 120–240 V electric baseboard heat
- System compatibility is limited to specified conventional and heat pump configurations
Best for: Households with a compatible conventional or heat pump system, an available C-wire, and a Matter-based smart home.
Not ideal for: Homes with electric baseboard heat, no C-wire, or HVAC systems beyond the stated stage limits.
Bottom line: Choose the X2S when Matter integration is central to your setup and your HVAC system and wiring meet its requirements.
“Choose the X2S when Matter integration is central to your setup and your HVAC system and wiring meet its requirements.”
Honeywell Home RTH9585WF1004 Wi-Fi Smart Color Thermostat
The Honeywell Home RTH9585WF makes the strongest case for buyers who want a display that feels more personal and useful at the wall. Its customizable color touchscreen puts local controls front and center, while the Sensi and X2S offer simpler LED or LCD screens. If household members regularly adjust temperature on the thermostat itself, that difference can matter more than another layer of smart home integration.It pairs that display with seven-day programming, app and voice control, energy reports, and equipment alerts, including filter and indoor condition alerts. Its compatible system list covers several forced-air, hot water, steam, and heat pump arrangements with electric backup. In comparison with the X2S, it gives more prominence to the touchscreen and reporting; the X2S has the stronger case for Matter integration and optional humidity display. The Sensi remains the more flexible choice when C-wire uncertainty or broader platform support is the priority.The RTH9585WF requires a C-wire and does not support electric baseboard heat, so its attractive interface does not make it a universal replacement. Its listed smart home support centers on Alexa and Google Home, rather than the wider platform selection Sensi provides or the Matter certification of the X2S. We see it as a focused pick for compatible homes where a polished wall display is a deciding factor.
Pros:
- Customizable color touchscreen
- Remote temperature control through app and voice
- Flexible seven-day programming and energy reports
- Filter and indoor temperature or humidity alerts
Cons:
- Requires a C-wire
- Not compatible with electric baseboard heat
- Smart home support is listed for Alexa and Google Home
Best for: Buyers with compatible HVAC and a C-wire who want a customizable color touchscreen, scheduling, and energy reports.
Not ideal for: Homes without a C-wire, homes with 120–240 V electric baseboard heat, or buyers prioritizing Matter or broad platform compatibility.
Bottom line: Choose the RTH9585WF when the touchscreen and energy reporting matter more to you than flexible wiring or Matter support.
“Choose the RTH9585WF when the touchscreen and energy reporting matter more to you than flexible wiring or Matter support.”
As an Amazon Associate we earn from qualifying purchases.
Before You Start
Set aside the required 1-2 hours and make sure your home Wi-Fi and phone are available. Locate the HVAC system switch or breaker that powers the equipment. Turn the system off before removing the old thermostat. Do not rely only on the thermostat screen being blank; verify the HVAC power source is off. Never connect wires based on color alone: terminal labels and the model-specific wiring diagram determine where each wire goes.
Stop before disconnecting anything if you find line-voltage wiring, damaged or brittle insulation, an unfamiliar multi-stage system, or wiring that does not match the compatibility guide. Photograph the wiring and ask a qualified technician to identify the system.
Step-by-Step Instructions
Step 1: Check compatibility and power requirements
Use the thermostat manufacturer’s compatibility checker and compare the result with your HVAC equipment labels and existing thermostat terminals. Identify whether your system is conventional or a heat pump, how many heating and cooling stages it has, and whether it uses accessories such as humidifiers or a dual-fuel setup. Check the thermostat’s instructions for a C-wire requirement and supported voltage. If the checker says the model is incompatible or asks for wiring you cannot identify, pause and choose a compatible model or contact a technician.
Tip: Terminal names differ between equipment. Follow the thermostat’s compatibility checker and diagrams, not a general wiring chart.
Check: You have a confirmed system type and a wiring plan approved for the exact thermostat model.
Step 2: Record the existing setup
Leave the old thermostat in place and set the HVAC system to Off. Remove the thermostat cover without pulling on any wires. Take a clear photo showing both the terminal letters and the wires attached to them. Write down each terminal label and label its wire at the wall before loosening any screw. Note settings such as heat-pump or gas configuration if the old thermostat displays them.
Tip: Photograph the wires close enough to read the terminal labels. A photo of wire colors alone is not a useful wiring record.
Check: Every attached wire has a label matching its old terminal, and you have a readable photo of the terminals.
Step 3: Turn off HVAC power
Switch off the HVAC system at its service switch or the correctly identified breaker. If the system has separate power sources for indoor and outdoor equipment, switch off the sources specified in the equipment or thermostat instructions. Confirm the old thermostat display goes blank, but do not treat that as the only proof that power is off. If you cannot identify the correct switch or breaker, stop and get help instead of opening the HVAC equipment cabinet.
Tip: Do not turn the power back on while thermostat wires are loose. A wire touching another terminal can damage the control board.
Check: The system is shut down, and you can remove the thermostat without the equipment running.
Step 4: Remove the old thermostat and prepare the wall
Release the labeled wires from the old thermostat one at a time, keeping them from slipping back into the wall. Remove the old mounting plate. If needed, patch or cover the old holes, then use the new thermostat’s mounting plate to mark the new holes. Drill and install the supplied anchors only after checking for hidden wiring or pipes. Feed the thermostat wires through the new base opening without damaging their insulation.
Tip: Do not let wires fall into the wall. If one slips out of reach, use a suitable retrieval tool rather than pushing a sharp object into the opening.
Check: The wires remain accessible and labeled, and the new base can sit flat against the wall.
Step 5: Connect the wires to the new thermostat
Follow the manufacturer’s wiring diagram for your confirmed HVAC type. Insert each labeled wire into the corresponding terminal, checking the terminal letter rather than relying on wire color. Connect only wires shown in the diagram. If the thermostat requires a C wire and none is available, use only the manufacturer’s approved adapter or arrange professional installation; do not bridge terminals or improvise a power source. Gently tug each connected wire to check that it is held securely, then fit the thermostat base to the wall.
Tip: Some thermostats use different terminals or an included wire adapter. A wire labeled differently at the old thermostat may need special handling; follow the model’s instructions.
Check: Each wire is secure in the correct terminal, no bare conductor is exposed outside a terminal, and the base is firmly mounted.
Step 6: Restore power and complete initial setup
Attach the thermostat display to its base as directed, then restore power at the service switch or breaker. Wait for the screen to start. Follow the on-screen setup to select the correct system type, heating fuel or equipment type, number of stages, and any supported accessories. Use the saved wiring photo and HVAC documentation if a setting is unclear. Do not choose a setting simply because it is the default.
Tip: If the display stays blank, turn power back off before checking that the thermostat is seated correctly and its wires are secure.
Check: The thermostat starts normally and displays the system configuration you confirmed earlier.
Step 7: Connect the thermostat to Wi-Fi and the app
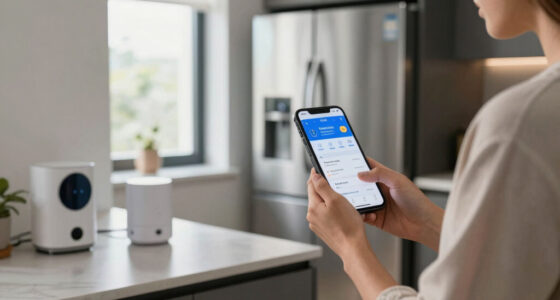
Install the manufacturer’s app on your phone or tablet and sign in or create an account. Follow its instructions to add the thermostat. Select your home Wi-Fi network and enter the password carefully; many smart thermostats require a 2.4 GHz network or a particular security setting. Keep the phone near the thermostat during pairing. Give the device a useful name, such as “Hallway,” and set your location and time zone if prompted.
Tip: Check the product’s network requirements before changing router settings. Avoid sharing your Wi-Fi password with anyone who does not need access.
Check: The app shows the thermostat as online and displays a temperature reading that updates.
Step 8: Set preferences and test heating and cooling
Choose the temperature units, preferred comfort settings, and fan behavior. Create a simple schedule that matches when people are normally home, asleep, or away; you can refine it after observing the system. Then test each supported mode separately: select Heat and set the target several degrees above the room temperature, wait for the system’s normal start delay, and confirm warm air or other expected heating operation. Set the mode to Off before testing Cool, then set the target several degrees below room temperature and confirm cooling after the equipment’s delay. Return the thermostat to your preferred schedule or setting after testing.
Tip: Heat pumps and air conditioners can have protective delays. Do not repeatedly switch modes or power-cycle the equipment to make it start faster.
Check: The thermostat calls for the selected mode, the HVAC system responds as expected, and the app reflects the new mode and setting.
Common Mistakes to Avoid
- Choosing a thermostat without checking the HVAC system type or stages. — Use the exact model’s compatibility checker before purchase and confirm the equipment details before wiring.
- Matching wires by color instead of terminal labels. — Photograph and label each wire by its original terminal, then follow the new thermostat’s model-specific diagram.
- Working with power on or letting a wire touch another terminal. — Shut off HVAC power before removing wires, keep them separated, and restore power only after connections are secure.
- Skipping the mode test or setting an incorrect equipment configuration. — Choose the confirmed system type and test Heat and Cool separately before relying on schedules or remote control.
Troubleshooting
Problem: The thermostat screen stays blank after installation.
Solution:
Turn HVAC power off, then confirm the thermostat is seated on its base and each wire is fully inserted into the intended terminal. Check the equipment’s specified switch or breaker. If the thermostat needs a C wire, confirm the approved wiring method is installed. Do not bypass a fuse or alter equipment wiring; contact a technician if power is present but the display remains blank.
Problem: The app cannot find the thermostat or pairing fails.
Solution:
Confirm the thermostat is powered and in pairing mode, keep the phone nearby, and check that your network meets the product’s Wi-Fi requirements. Re-enter the password and check that the phone is connected to the same home network. Restart the app and follow the manufacturer’s reset or pairing instructions; avoid factory-resetting unless the manual recommends it.
Problem: Heating or cooling does not start during the test.
Solution:
Check that the thermostat is in the intended mode and that the target temperature is beyond the room temperature in the correct direction. Wait through the equipment’s normal delay, then check the HVAC switch or breaker. If the system still does not respond, turn power off and compare each connection with your wiring photo and the thermostat diagram. Stop and call a technician if any terminal is uncertain.
Problem: The system runs the wrong mode or behaves unexpectedly.
Solution:
Stop testing and set the thermostat to Off. Recheck the selected system type, heat-pump settings, reversing-valve option, and stage configuration against the equipment manual and wiring diagram. Do not keep trying alternate settings at random. If the correct configuration is unclear, ask an HVAC technician to verify it.
What Success Looks Like
The installation is complete when the thermostat is firmly mounted, its screen and app show current information, and the app reports the device online. The wiring matches the model-specific diagram, the system responds correctly to separate heating and cooling tests, and the schedule and time zone match your preferences. The thermostat should not show a wiring or equipment error, and the HVAC system should stop or change operation when you adjust its mode or target temperature. Keep the old thermostat and wiring photo until the new setup has worked reliably.
Next Steps
Monitor the thermostat and HVAC operation for the next few days. Adjust the schedule in small increments and check whether the system maintains comfortable temperatures without running unexpectedly. Review the app’s alerts and permissions, and enable account security features offered by the manufacturer. Keep the installation manual and wiring photo with your HVAC records. Clean or replace HVAC filters according to the equipment instructions; a thermostat does not replace routine system maintenance. If you move, change HVAC equipment, or notice persistent short cycling, incorrect temperatures, or wiring alerts, pause smart features and have the setup checked by a qualified technician.
Frequently Asked Questions
Can I install a smart thermostat without a C wire?
Some models can operate without a C wire, while others require one. Check the exact thermostat’s compatibility tool and instructions. Use an included, manufacturer-approved adapter if specified; do not connect wires to terminals by guesswork.
How long should I wait for heating or cooling to start?
Startup time varies by equipment. A heat pump or air conditioner may pause briefly to protect the compressor. Check the HVAC and thermostat manuals for the expected delay, and avoid rapidly switching modes while waiting.
Will a smart thermostat work with every Wi-Fi router?
No. Thermostats can have limits on Wi-Fi frequency, security, or network configuration. Check the model’s network requirements and router settings before installation. If pairing fails, use the manufacturer’s troubleshooting steps rather than weakening network security without guidance.
Should I leave the old thermostat wiring connected while setting up the new one?
No. Turn off HVAC power before disconnecting the old thermostat. Label each wire and photograph its terminal first, then connect wires according to the new thermostat’s diagram. Keep the old thermostat until the new one passes testing.