
TL;DR
Moving your rig away from your workspace is the most effective way to cut noise. Proper placement, sealing gaps, and ventilation are critical for a quiet and safe closet setup. Foam alone won’t block sound—think about barriers and decoupling instead.
Imagine your noisy AI rig, humming and roaring in a closet, out of sight and out of mind. Turns out, the best way to quiet a loud machine isn’t just stuffing it with foam. It’s about where you put it, how you treat the space, and making sure it can breathe. If you’re tired of the racket ruining your workflow or disturbing your household, this guide will show you how to make your closet work for you — not against you.
We’ll cover practical solutions—from simple placement tricks to advanced ventilation—and bust some myths about soundproofing. Whether you want to keep noise down or just want a quiet space for voiceovers, you’ll find real-world tips backed by sound science and common sense.
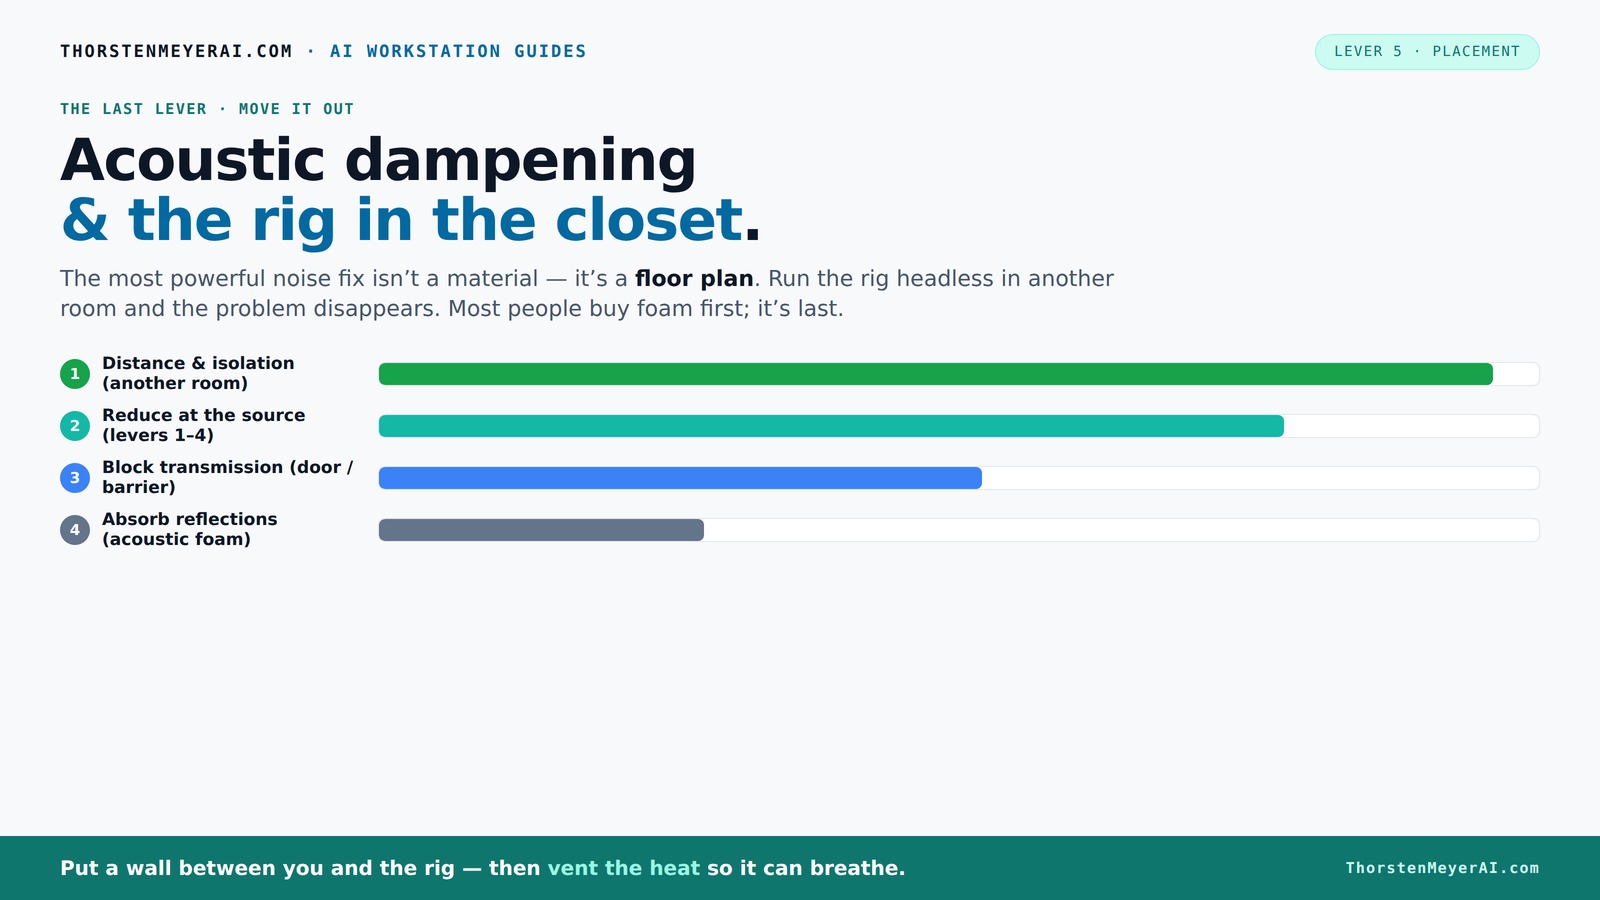
Acoustic dampening
& the rig in the closet.
The most powerful noise fix isn’t a material — it’s a floor plan. A rig you can’t hear because it’s in another room beats any amount of foam. Tap the approaches in Part 1 to see what actually works.
(another room)
(levers 1–4)
(door / barrier)
(acoustic foam)
Contain the noise, not the heat
Key Takeaways
- Moving your rig into another room or closet is the most effective noise reduction method.
- Proper ventilation is critical in sealed closet setups to prevent overheating and maintain performance.
- Targeted placement of acoustic panels at reflection points beats blanket coverage or corner-only treatment.
- Foam panels absorb reflections but do not block sound transfer—use barriers and sealing for soundproofing.
- Sealing gaps around doors, vents, and cracks offers quick, affordable noise reduction—don’t skip this step.

Focusound 52 Pack Acoustic Foam Panels 1" x 12" x 12" Sound Proof Foam Panles Soundproofing Noise Cancelling Wedge Panels for Home Office Recoding Studio with 300PCS Double-Side Adhesive
Soundproofing - Acoustic foam panels triangular grooves structure for better noise absorption, helps to reduce and absorb unwanted...
As an affiliate, we earn on qualifying purchases.
As an affiliate, we earn on qualifying purchases.
Why Moving Your Rig Is the #1 Noise Fix (And How to Do It)
The biggest noise reduction trick? Just move your machine out of the room. Think of it like turning down the volume without touching the dial. When your rig is in another room—say, a basement or closet—you won’t hear its fan noise or GPU hum anymore.
This approach works because sound diminishes with distance. A rig in a closet on the other side of your house can be as loud as a jet engine nearby, but you won’t hear it from your desk. Your laptop or thin client becomes your new main device, and the actual rig stays silent in another space.
For optimal setup, connect via wired Ethernet or strong Wi-Fi, and set up a dedicated ventilation system. This way, your rig stays cool, and you keep your workspace peaceful. It’s a simple, low-cost fix that saves you from buying dozens of foam panels.

Ekkogo Studio Monitor Isolation Pads Premium Acoustic Foam Elevates Audio Ideal for 5 Inch Speakers Enhanced with Vibredux HD Foam for Superior Isolation
【ADVANCED VIBREDUX HD FOAM】: Experience the acoustic excellence of Vibredux HD foam with Ekkogo's Studio Monitor Isolation Pads....
As an affiliate, we earn on qualifying purchases.
As an affiliate, we earn on qualifying purchases.
The 'Rig in the Closet' Setup — Why It Works and Its One Big Caveat
Placing your rig in a closet can be a game-changer for noise. Close the door, and suddenly, the loud hum vanishes from your workspace. It’s a quick, effective fix used by many home studios and AI enthusiasts.
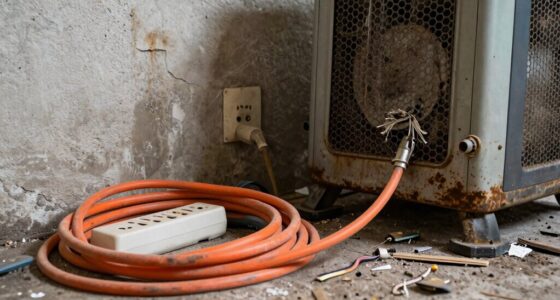
But, beware — a sealed space traps heat. A GPU pulling 600W continuously in a small, airtight closet can turn into a mini oven. The temperature rises steadily, causing thermal throttling and loud fan noise as the system fights to cool down.
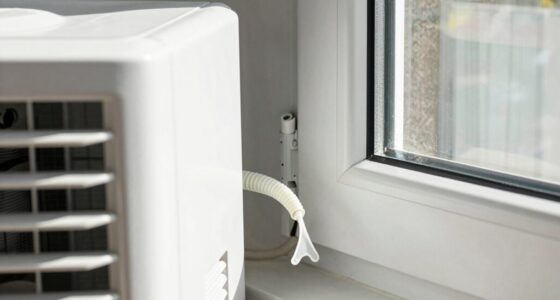
The secret? Ventilation. Incorporate passive vents or quiet exhaust fans to let hot air escape. Better yet, consider purpose-built soundproof cabinets with integrated cooling. These combine soft lining for sound absorption with active airflow, balancing quiet and cooling needs. You can find such solutions on [this page](https://thorstenmeyerai.com/reduce-heat-noise-ai-workstation/), which discusses the essentials of air circulation and heat management.
Understanding this tradeoff is crucial: sealing the closet enhances soundproofing but can lead to overheating if not properly ventilated. The goal is to find a balance that maintains both silence and safe operating temperatures, which often involves investing in specialized cooling solutions or designing a vented enclosure that allows heat to escape without compromising sound isolation.
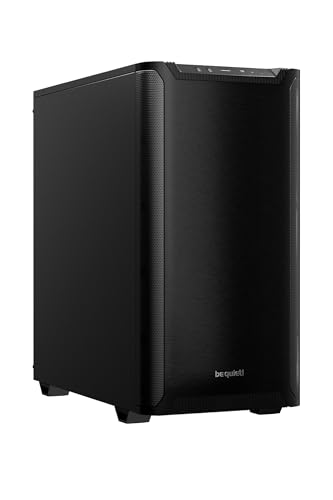
be quiet! Pure Base 501 Black ATX Case | 2 Preinstalled Pure Wings 3 140mm PWM Fans | Optimized Air Pressure | Compact PC Case | Vertical GPU Installation | USB 3.2 Gen. 2 Type C | BG073
Without any distractions, Pure Base 501 is reduced to excel at its core functions and is aimed at...
As an affiliate, we earn on qualifying purchases.
As an affiliate, we earn on qualifying purchases.
How to Get the Most Out of Acoustic Dampening in Tight Spaces
Acoustic dampening in a small closet isn’t about plastering every inch with foam. It’s about strategic placement and understanding what sound you’re fighting. Focus on treating reflection points—behind the mic, the side walls, and ceiling—where sound bounces and creates that annoying echo.
Use soft, absorbent materials like moving blankets, carpets, or thick curtains on hard surfaces. For example, hanging a thick blanket behind your mic reduces harsh reflections, making your recordings clearer. You don’t need to cover every wall—targeting the main reflection points makes a bigger difference.
Here’s a quick setup list:
- Place absorption panels at reflection points—use a mirror to find them
- Seal gaps around the door with weatherstripping or acoustic sealant
- Add soft surfaces—rugs, blankets—to reduce harshness
- Use a reflection filter for vocal recordings as a portable, low-cost solution

8" Room to Room Fan with Remote, Reversible Through Wall Fan for Quietly Circulating Air, 320 CFM Through the Wall Fan with Temperature Control, Durable Build Quality, In Wall Fan for Closet, Laundry
【QUIET, MOVE MASSIVE AIR】 This room to room air transfer fan features a unique reversible airflow design and...
As an affiliate, we earn on qualifying purchases.
As an affiliate, we earn on qualifying purchases.
The Truth About Foam: Will It Block Sound or Just Absorb It?
Many assume foam panels will soundproof a closet. The reality? Acoustic foam is great at absorbing reflections and reducing echo, but it doesn’t block sound passing through walls or doors. Foam alone is a false hope for true soundproofing.
For example, a foam panel might make your room sound less echoey, but a loud GPU in a closet can still be heard through the door or any gaps. To block sound transfer, you need barriers—like a solid door, sealing gaps, or mass-loaded vinyl. Foam is a complement, not a substitute, for proper soundproofing.
Understanding this distinction is vital because relying solely on foam can give a false sense of security. While foam improves the listening environment by reducing reflections, it does little to prevent sound from leaking out or in. For effective soundproofing, you need to combine foam with sealing all gaps and adding mass to the structure. This layered approach ensures your noise stays contained and your space remains quiet.
According to soundproofcow.com, effective soundproofing involves sealing all leaks and adding mass, not just lining the walls with foam.
Sealing Gaps and Making Your Closet Truly Quiet
Sound leaks through cracks, gaps, and poorly sealed doors. Before you invest in foam or panels, seal every crack with weatherstripping or acoustic sealant. This simple step can cut noise transfer dramatically.
For example, sealing the door gap with weatherstripping reduces noise leakage by over 50%, according to acoustic treatment experts. Use foam weatherstripping around the door frame, and seal any holes or vents with acoustic caulk.
Don’t forget to check windows and vents. Blocking these with blankets or specialized acoustic covers can make your closet significantly quieter. This is often the cheapest and most effective first move for any soundproofing project.
Keep in mind that sealing gaps not only reduces noise transfer but also improves the overall effectiveness of your acoustic treatments by preventing sound from bypassing panels and barriers. For more tips, visit Berkley Vallone’s home improvement guides to ensure your space stays quiet and well-insulated.
Targeted Surface Treatment: Where and How to Place Absorbers
In a tiny closet, surface treatment matters more than extensive coverage. Focus on the main reflection points—behind the mic, the ceiling, and side walls near the monitor. Use 2-inch thick panels for mid-range absorption, and consider adding bass traps in corners if low-end buildup is an issue.
For example, a small vocal booth might only need panels on the wall directly behind the mic and a few on the ceiling to tame reflections. This targeted approach saves money and space while vastly improving sound quality.
Remember, more mass in strategic spots reduces echo and harshness. In some cases, hanging a thick blanket on the wall or ceiling can be a quick, effective solution.
Strategic placement isn’t just about reducing echo; it also prevents sound from bouncing back into your microphone or monitor, which can cause phase issues or muddiness. Prioritizing critical reflection points ensures your treatments are effective without cluttering your limited space, maintaining both sound clarity and room functionality.
When to Go Beyond Foam: Upgrading for Better Sound and Heat Control
If your setup still sounds or feels too loud, consider adding more mass—like drywall or insulation—especially on walls facing adjoining spaces. For heat management, upgrade to active cooling solutions such as liquid cooling or ducted fans. These help keep your rig cool without adding noise.
For instance, replacing stock fans with quiet, high-quality models and adding ducting can keep temperatures down, reducing throttling noise. Additionally, exploring [liquid cooling](https://thorstenmeyerai.com/liquid-vs-air-cooling-inference-rig/) options can significantly improve performance and silence. These upgrades not only improve thermal management but also contribute to a quieter environment by reducing the need for noisy fan operation.
Investing in cooling solutions that are designed for low noise levels ensures your rig remains both cool and quiet, extending its lifespan and maintaining optimal performance. This balance between soundproofing and heat management is crucial for long-term stability and productivity.
Common Mistakes That Make Your Closet Setup Worse
Most DIYers fall into traps that undo their efforts. Over-treating corners, relying solely on foam, ignoring gaps under doors, or sealing the space completely without airflow all cause problems. For example, sealing a closet door airtight without ventilation makes the system overheat and noise worse.
Always remember: effective soundproofing combines sealing, mass, and ventilation. Ignoring any one makes your efforts less effective—or even counterproductive.
Learn from these mistakes: always plan your mic placement, treat reflection points, seal gaps, and provide airflow. That’s the proven way to get true quiet and healthy rig performance.
Failing to include proper ventilation or over-sealing can lead to overheating, which not only hampers performance but can also cause hardware damage over time. Balance is key: ensure that your sealing efforts do not eliminate necessary airflow, which is vital for maintaining a safe operating temperature and preserving the longevity of your equipment.
Frequently Asked Questions
Can I make a closet booth without permanent construction?
Absolutely. Using blankets, rugs, weatherstripping, and portable acoustic panels can turn a closet into a functional booth without rebuilding. These DIY solutions are flexible and cost-effective, perfect for temporary or adjustable setups.
Do I need bass traps in a small closet?
It depends. If you notice low-end buildup or boomy sound when recording or mixing, adding bass traps in the corners can help. For basic voice work or light use, targeted absorption on reflection points may suffice.
Will foam panels soundproof my closet?
Not really. Foam absorbs reflections and reduces echo but does little to block sound leakage through doors or gaps. For true soundproofing, combine sealing, barriers, and mass with your foam treatment.
How do I stop sound from leaking under or around the closet door?
Seal gaps with weatherstripping or acoustic sealant. Consider adding a door sweep or draft blocker. These small steps can drastically cut down noise leaks, making your setup much quieter.
Is a reflection filter enough for vocal recording?
A reflection filter helps reduce room reflections and harshness, but it doesn’t block external noise or sound leaks. For best results, combine it with proper room treatment and sealing.
Conclusion
Quieting a noisy rig isn’t about buying a ton of foam; it’s about smart placement, sealing gaps, and ensuring proper airflow. When you treat a closet like a mini studio, you control the noise and heat, turning chaos into calm.
Think of your setup like a well-orchestrated system—each part, from ventilation to surface treatment, plays a role. With these simple, proven strategies, you’ll have a whisper-quiet rig and a workspace that’s more inspiring than ever.