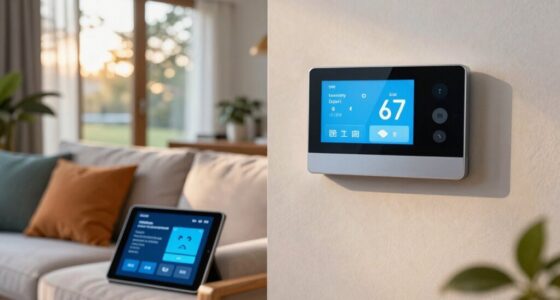
Before you remove your old thermostat, make certain you know your system type, whether it’s central heating, heat pump, or something else. Check the wiring compatibility, especially for a C-wire, to guarantee your new thermostat will work. Turn off the power at the circuit breaker to stay safe. Finally, note how the wires are connected before removing them. If you’re unsure about any steps, there’s more helpful information ahead to guide you.
Key Takeaways
- Identify your system type (e.g., heating, cooling, heat pump) to ensure compatibility with the new thermostat.
- Evaluate wiring requirements and check for a C-wire to support continuous power needs.
- Turn off power at the circuit breaker to ensure safety during removal.
- Label or photograph existing wiring connections for accurate installation of the new thermostat.
- Research new thermostat features to find one that meets your lifestyle and energy-saving needs.

Before you tackle the task of removing your old thermostat, there are a few key checks you should make to guarantee a smooth process. First and foremost, you need to familiarize yourself with your current system type. Whether you have a central heating and cooling system, a heat pump, or perhaps a baseboard heating system, knowing how your system operates will help you choose the right replacement thermostat. If you don’t know your system type, check the user manual or take a quick look at the equipment itself, as it often has labels indicating what kind of system you have.
Before replacing your thermostat, identify your system type to ensure compatibility with the new unit.
Next, it’s essential to evaluate the wiring compatibility. Different thermostats can have varying wiring requirements, and you don’t want to end up with a new thermostat that doesn’t match your existing wiring setup. Take a picture of the wiring configuration before you disconnect anything. This way, you’ll have a reference when you’re installing the new unit. If your old thermostat has a C-wire, which provides continuous power, and the new one requires it, make sure that your new thermostat supports this wiring. If it doesn’t, you might need to run a new wire or find an alternative model that suits your setup.
Don’t forget to turn off the power to your heating and cooling system before you start working. You can do this at the circuit breaker or by removing the fuse. This step ensures your safety and prevents any accidental short-circuits while you’re handling the wiring. Once you’ve confirmed the power is off, you can proceed with removing the old thermostat.
As you take off the old unit, keep an eye out for any labels or markings on the wires. These can provide guidance on where each wire connects on the new thermostat. If you encounter any unfamiliar wiring colors or configurations, consult the installation guide for the new unit or seek help from a professional.
Lastly, consider the features you want in a new thermostat. Smart thermostats, for example, offer energy-saving options and remote access through apps. Think about what will work best for your lifestyle. By taking these steps, you’ll set yourself up for a successful thermostat replacement, making sure your home remains comfortable year-round.
As an affiliate, we earn on qualifying purchases.
Frequently Asked Questions
How Can I Identify My Thermostat Type Before Removal?
To identify your thermostat type before removal, check the wiring color and compatibility. Look at the wires connected to your current thermostat; common colors include red for power, white for heat, green for fan, and yellow for cooling. Note the labels on the terminals, as they often indicate the type, like R, W, G, or Y. Research your thermostat model online or consult the manual to guarantee your new thermostat is compatible with your existing wiring.
What Tools Do I Need for Thermostat Removal?
Did you know that nearly 70% of homes use programmable thermostats? To remove your thermostat, you’ll need a few essential tools: a screwdriver for the screws, a voltage tester to guarantee safety, and pliers for wire handling. Pay attention to the wire colors for proper reconnection, and check your new thermostat’s compatibility with the existing system. Having these tools ready makes the removal process smoother and safer for you.
Is It Safe to Remove the Thermostat Myself?
Yes, it’s generally safe to remove the thermostat yourself, but you need to take some safety precautions. Before you start, turn off the power to your heating and cooling systems to avoid any electrical hazards. Pay attention to wiring considerations; label the wires as you disconnect them to guarantee correct reinstallation later. Always follow manufacturer guidelines and consult your manual if you’re unsure about any steps. Staying cautious will make the process smoother.
Can I Reuse My Old Thermostat With a New System?
You can often reuse your old thermostat with a new system, but compatibility issues might arise. Before making the switch, check the wiring considerations carefully. If the new system requires different wiring or communication protocols, you might face challenges. It’s essential to guarantee that the old thermostat can handle the updated technology. Take a moment to match specifications; you might save time and effort by confirming everything aligns before installation.
What Should I Do With the Old Thermostat After Removal?
After removing your old thermostat, consider recycling it. Many components can be reused or repurposed. Check local disposal guidelines to confirm you’re following proper protocols. Some electronics stores or recycling centers accept thermostats for recycling, so it’s worth looking into those options. If you can’t recycle, dispose of it responsibly by throwing it in the trash, but make sure you’re aware of any local regulations regarding electronic waste.
As an affiliate, we earn on qualifying purchases.
Conclusion
Before you plunge into removing your old thermostat, remember that it’s all about taking the right precautions. Sure, it might seem intimidating, but with a little patience and the right checks, you’ll be fine. Double-checking wiring and compatibility can save you from headaches later. Plus, think of the satisfaction you’ll feel once you’ve successfully replaced it! So, roll up your sleeves, and embrace the challenge—you’ve got this!
digital thermostat with remote access
As an affiliate, we earn on qualifying purchases.
As an affiliate, we earn on qualifying purchases.
heat pump thermostat replacement
As an affiliate, we earn on qualifying purchases.
As an affiliate, we earn on qualifying purchases.