To install a smart thermostat, start by choosing a compatible device that suits your heating needs and connects easily to your Wi-Fi. Next, prepare your workspace with the right tools and guarantee safety by shutting off power at the breaker. Remove your old thermostat carefully, then connect the wiring to the new unit, securing it properly. Mount the device, then configure its settings and connect it to your network. Follow these steps closely to ensure a smooth setup and enjoy your smart home upgrade.
Key Takeaways
- Choose a compatible smart thermostat suited to your HVAC system and home needs.
- Turn off power at the breaker and verify power is disconnected before beginning installation.
- Remove the old thermostat, noting wire connections, and prepare the mounting area.
- Connect the new thermostat wires securely according to manufacturer instructions.
- Configure Wi-Fi settings, customize schedules, and test the device for proper operation.
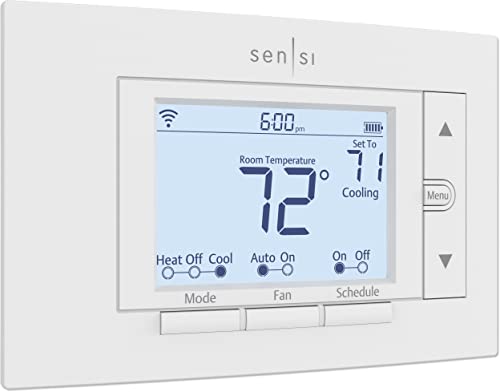
Emerson Sensi Wi-Fi Smart Thermostat for Smart Home, DIY, Works With Alexa, Energy Star Certified, ST55
PRIVACY PROTECTION*: Sensi won’t sell your personal information to third parties
As an affiliate, we earn on qualifying purchases.
As an affiliate, we earn on qualifying purchases.
Choosing the Right Smart Thermostat for Your Home
Choosing the right smart thermostat for your home starts with understanding your heating and cooling needs. You’ll want to consider wireless compatibility, making sure the device connects seamlessly to your Wi-Fi network for easy control and updates. Compatibility with your existing HVAC system is also vital, so check whether the thermostat supports your system type. When it comes to brand selection, opt for trusted brands known for reliability and good customer support. Research features like scheduling, energy reports, and voice control to match your lifestyle. Keep in mind that some brands offer more intuitive apps and better integration with smart home ecosystems. Additionally, assessing the installation process and whether professional help is needed can save time and ensure proper setup. Understanding the technology integration capabilities can also enhance your overall smart home experience. To maximize efficiency, consider how the thermostat connects with other devices, creating a cohesive smart home environment. Making an informed choice now will make installation smoother and guarantee your thermostat meets your comfort and efficiency goals.
Emerson Sensi Wi-Fi Smart Thermostat for Smart Home, DIY, Works With Alexa, Energy Star Certified, ST55
PRIVACY PROTECTION*: Sensi won’t sell your personal information to third parties
As an affiliate, we earn on qualifying purchases.
As an affiliate, we earn on qualifying purchases.
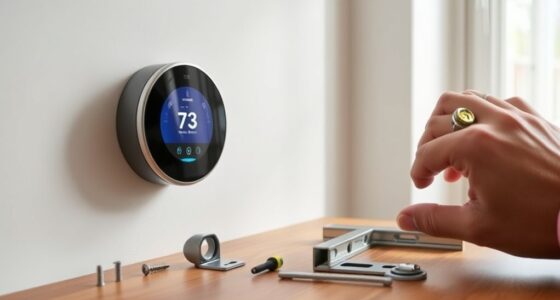
Preparing Your Workspace and Gathering Tools
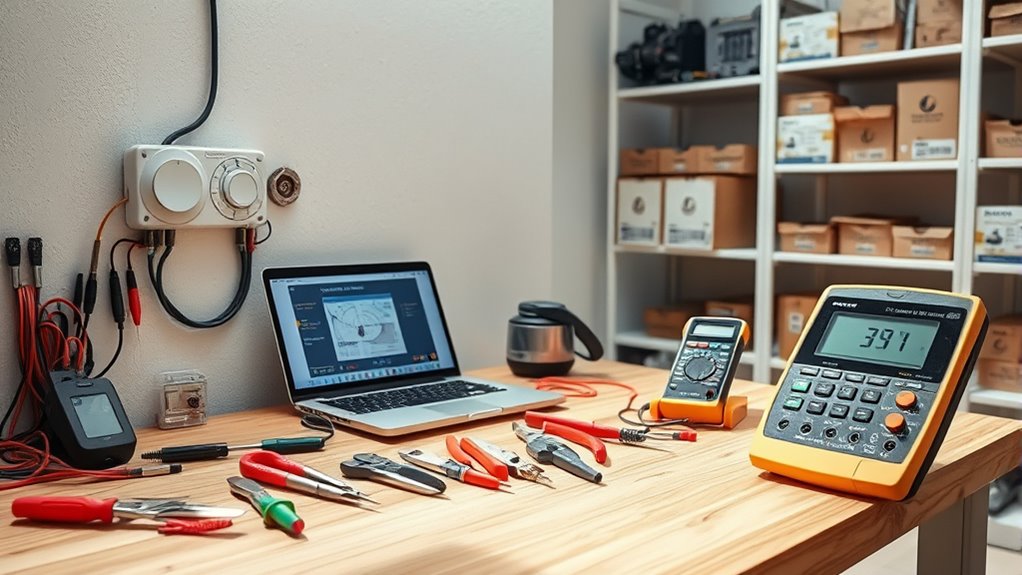
Before you start, clear your workspace to guarantee safety and efficiency. Gather all the essential tools you’ll need, like a screwdriver, wire strippers, and a voltage tester. Having everything within reach helps the installation go smoothly and prevents unnecessary delays. Additionally, understanding basic field recording techniques can help you identify potential environmental factors that may affect your installation site. Being aware of privacy and cookie usage policies can also inform you about how data may be collected during online research for your project. Familiarizing yourself with special occasions can also provide insights into scheduling your project around community or religious events that may impact your availability.
Clear Workspace Area
To guarantee a smooth installation process, start by clearing your workspace of any clutter or obstacles. A clean workspace helps you move freely and keeps you focused on the task. Remove unnecessary items, such as decorations or furniture, that could get in the way. As you clear the area, organize your tools so they’re easily accessible. Use organizing tools like small containers or trays to keep screws, wires, and other small parts in order. This prevents losing pieces and saves time during installation. Make sure the surface is flat and well-lit so you can see what you’re doing. A tidy, organized space minimizes distractions and reduces the risk of mistakes, making your smart thermostat installation safer and more efficient. Additionally, understanding proper hamster care can help ensure your pet stays healthy and happy if you decide to care for one during your project. Being familiar with local resources and tools can also help you acquire any additional equipment you might need quickly and easily. Moreover, understanding Gold IRA regulations can help you avoid costly mistakes if considering future investments related to your financial planning.
Gather Essential Tools
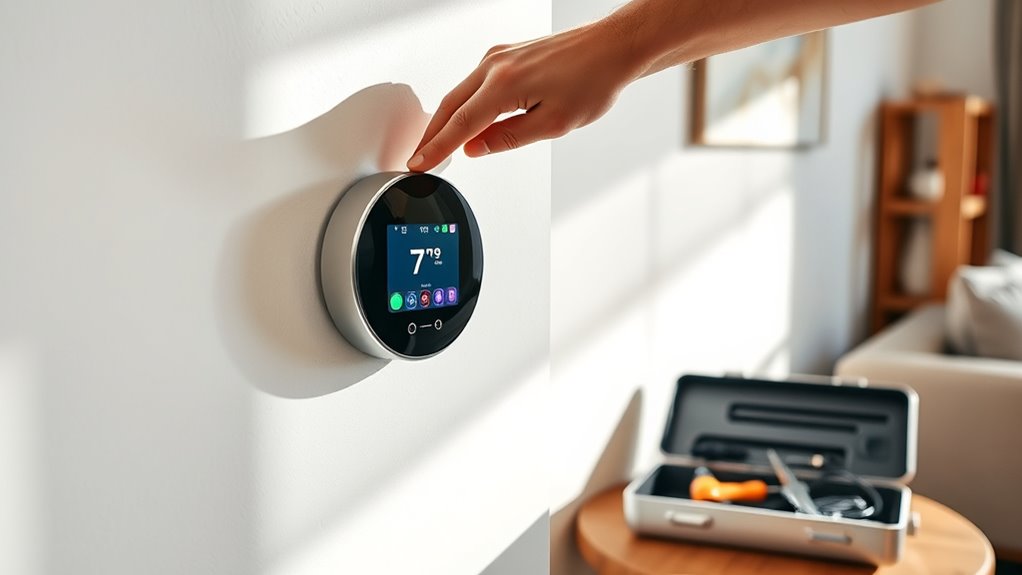
Once your workspace is clear and organized, it’s time to gather all the essential tools you’ll need for the installation. Start with a screwdriver, voltage tester, and wire strippers to handle wiring safely. Have a drill on hand if mounting requires new holes. Keep a level nearby for precise placement. You’ll also need the thermostat’s user interface components, such as the display panel and mounting plate. Don’t forget to gather the temperature sensors, which help monitor room conditions accurately. Having a smartphone or tablet ready can be useful for syncing the thermostat and adjusting settings. Additionally, understanding sound healing science can inspire a calming environment that complements your smart home setup. It’s also helpful to familiarize yourself with Kia Tuning concepts if you’re integrating your smart thermostat with other smart devices for a cohesive experience. Reviewing HVAC system compatibility ensures your new thermostat will work seamlessly with your existing setup. Finally, gather any necessary wall anchors or screws. Being prepared with these tools and components ensures a smooth installation process and a well-functioning smart thermostat.

Wall Thermostat Installation Kit US Market Only
Connects for enhanced performance by working with all thermostats
As an affiliate, we earn on qualifying purchases.
As an affiliate, we earn on qualifying purchases.
Turning Off Power and Ensuring Safety
Before you start installing your smart thermostat, turn off the circuit breaker to cut power to the system. Double-check that the power is completely off by testing the wires or outlets. Safety comes first, so don’t skip this essential step. Additionally, consult your grocery savings strategies to ensure your home is prepared for any unexpected issues during installation. Being aware of electrical safety precautions can help prevent accidents and protect your home’s wiring. Ensuring proper power supply is crucial for a safe and successful installation process.
Turn Off Circuit Breaker
Turning off the circuit breaker is a crucial first step to guarantee safety during thermostat installation. This prevents accidental electrical shocks and protects your equipment. Locate your main electrical panel and identify the circuit breaker controlling your HVAC system. Flip the breaker to the OFF position to cut power completely. To visualize, here’s a quick overview:
| Circuit Breaker | Function |
|---|---|
| Main Breaker | Controls entire house |
| HVAC Breaker | Powers heating/cooling |
| Other Breakers | Light, outlets, etc. |
| Your Thermostat | Connected through HVAC |
Always double-check that the circuit breaker is off before proceeding. Ensuring electrical safety minimizes risks and keeps you safe throughout the installation process. Proper electrical safety measures are essential for a smooth and secure installation. For added assurance, use a voltage tester to confirm that no power is present before touching any wires.
Confirm Power Is Off
After flipping the circuit breaker to the OFF position, it’s important to verify that power has actually been cut. This guarantees your safety and prevents electrical accidents during thermostat installation. Use a voltage tester or multimeter to check the wires or terminals connected to the existing thermostat. If the tester shows no voltage, you can confidently proceed, knowing electrical precautions are met. Always prioritize power safety by double-checking before handling any wiring. Confirming the power is off minimizes the risk of electric shock or short circuits. Additionally, understanding the importance of electrical safety can help you avoid common hazards during DIY projects. Being aware of proper safety procedures ensures that you follow all necessary steps to protect yourself and your home’s electrical system. Awareness of creative practice principles can also inspire innovative solutions for troubleshooting electrical issues. If you’re unsure or uncomfortable, consider consulting a professional. Confirming the power is off minimizes the risk of electric shock or short circuits. Remember, following proper electrical precautions is essential to ensure a safe and smooth installation process. Taking these steps protects you and your home’s electrical system.
Emerson Sensi Wi-Fi Smart Thermostat for Smart Home, DIY, Works With Alexa, Energy Star Certified, ST55
PRIVACY PROTECTION*: Sensi won’t sell your personal information to third parties
As an affiliate, we earn on qualifying purchases.
As an affiliate, we earn on qualifying purchases.
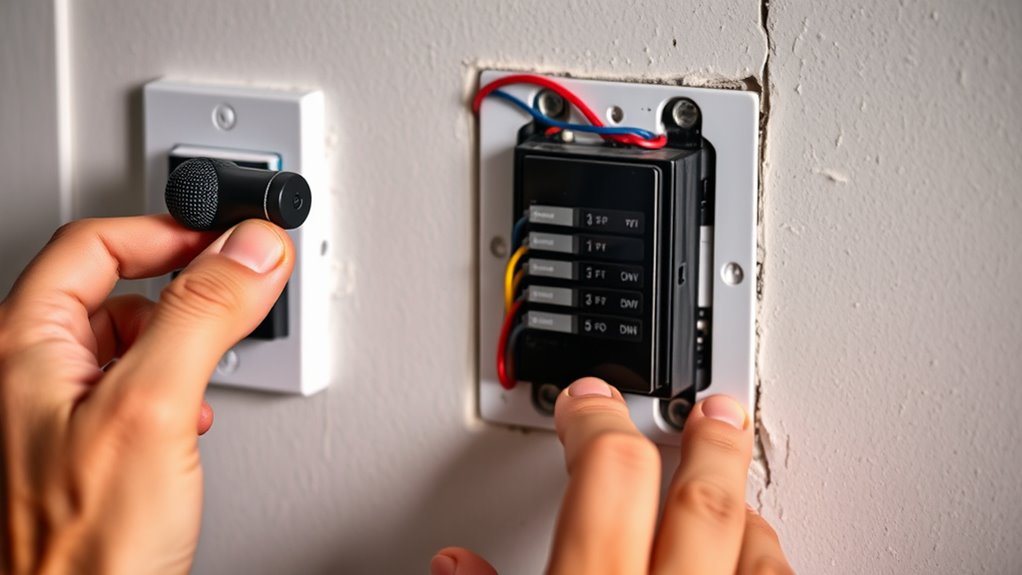
Removing Your Old Thermostat

Removing your old thermostat is a straightforward process, but it’s important to handle it carefully to avoid damaging your wiring or HVAC system. Start by removing the faceplate and then loosen the mounting screws. As you detach the old thermostat, focus on wire removal; note which wires connect to each terminal. Use a screwdriver to gently disconnect them, and consider taking a photo for reference. Be cautious not to pull on the wires too hard. To keep things organized, use the following table:
| Terminal | Wire Color | Function |
|---|---|---|
| R | Red | Power |
| W | White | Heat |
| Y | Yellow | Cooling |
| G | Green | Fan |
| C | Blue/Black | Common |
This helps ensure smooth wiring later. Additionally, understanding the types of wires involved can aid in troubleshooting or upgrades later on. Recognizing the expansion of automation technologies can also help you better plan future upgrades to your HVAC system. It’s also helpful to familiarize yourself with local divorce laws if you’re considering legal separation or divorce, as procedures can vary significantly by state.
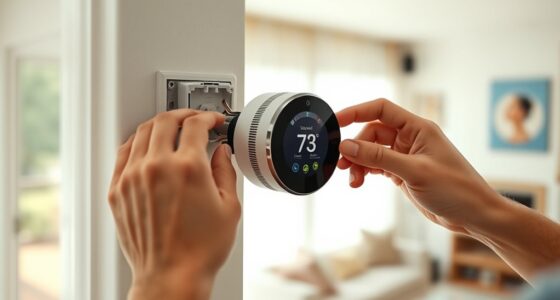
Connecting the Wiring to Your New Device
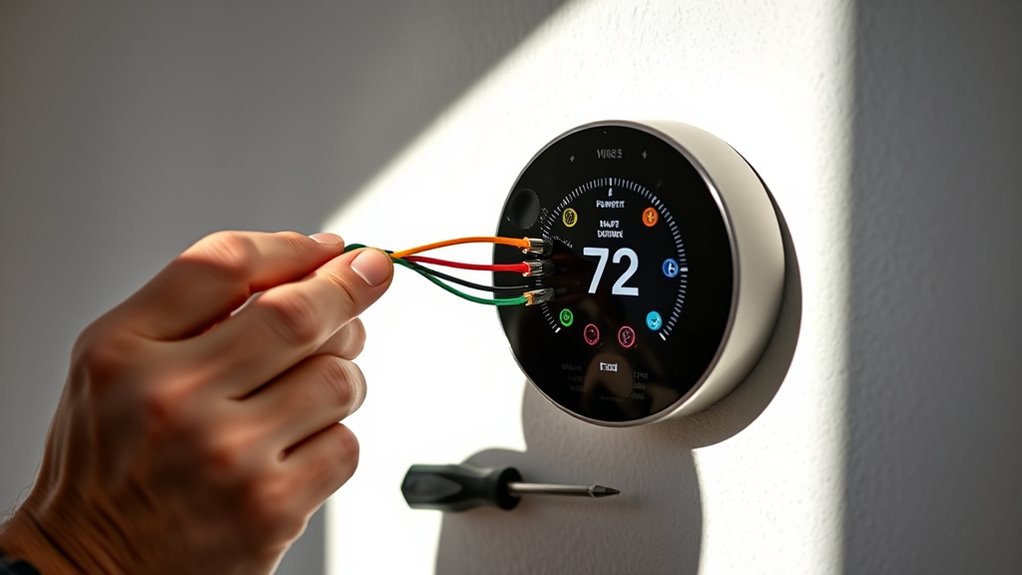
Before connecting the wiring to your new thermostat, make sure the power is turned off at the breaker to avoid electrical hazards. Check the wire color coding on your existing setup; most systems follow standard conventions, like red for power and white for heat. Carefully label each wire if needed. When connecting, ensure compatibility considerations are met—some smart thermostats work with specific wiring configurations or require additional adapters. Use the provided screws or terminals to secure each wire firmly, preventing loose connections that could cause malfunction. Double-check that all wires are correctly matched to their corresponding terminals according to the manufacturer’s instructions. Additionally, verifying the wired connections and understanding the cybersecurity implications of connected devices can help prevent unauthorized access and ensure your system remains secure during and after installation. Properly assessing wired connections is crucial for a safe and reliable installation. Taking these precautions guarantees a safe and reliable connection, setting the stage for your smart thermostat to operate smoothly.
Mounting and Securing the Smart Thermostat
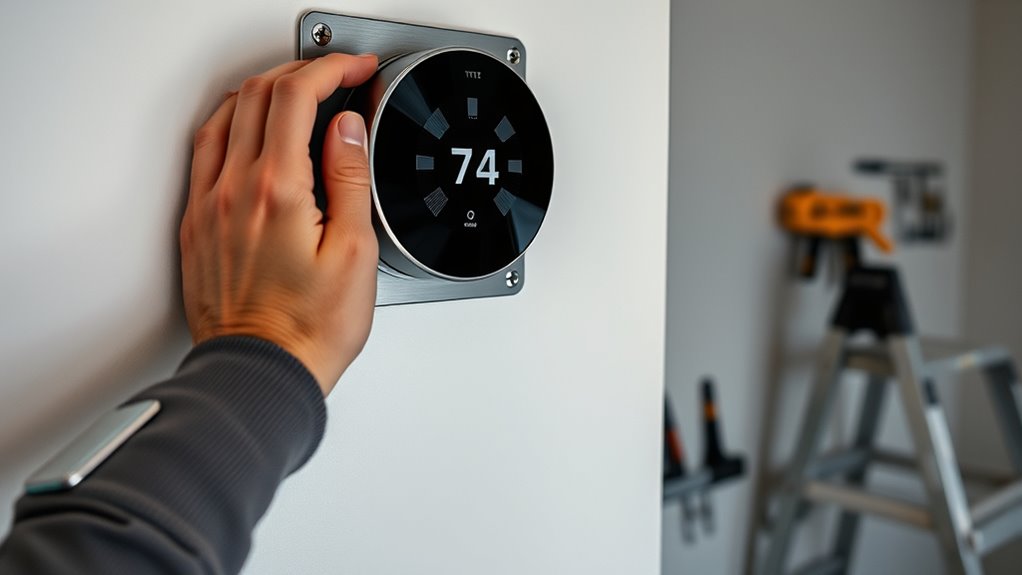
To securely mount your smart thermostat, start by choosing a suitable location on the wall that is accessible, away from direct sunlight, drafts, or sources of heat. Use the mounting techniques recommended by the manufacturer, which typically involve aligning the device with the mounting plate and securing it firmly. Confirm you have the appropriate securing hardware, such as screws and anchors, suited for your wall type.
| Mounting Technique | Securing Hardware |
|---|---|
| Wall plate alignment | Screws and anchors |
| Leveling before securing | Power drill (if needed) |
| Using template guides | Wall anchors for drywall |
| Ensuring flush fit | Screwdriver for tightening |
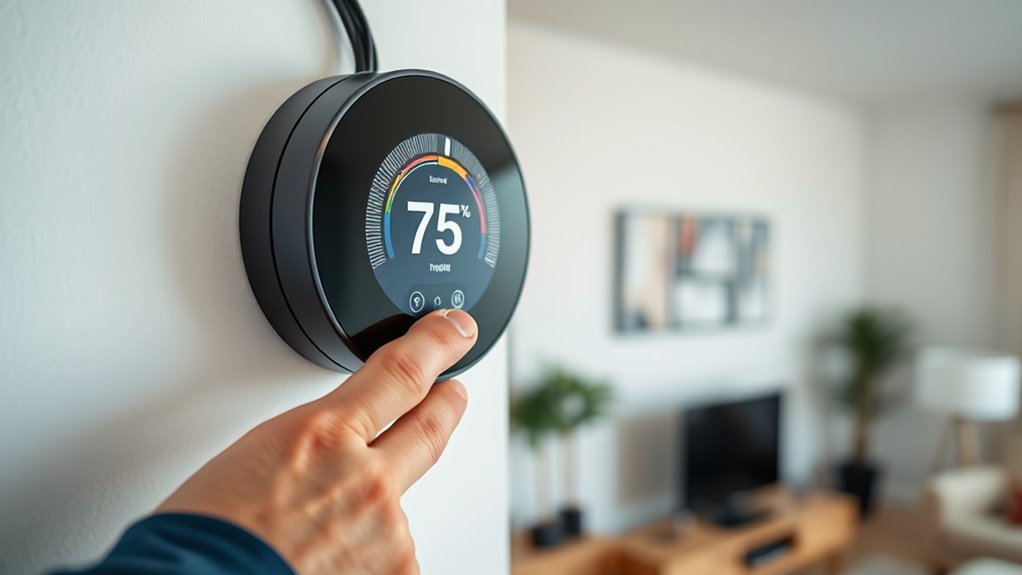
Configuring Settings and Connecting to Wi-Fi

Setting up your smart thermostat’s settings and connecting it to Wi-Fi is a straightforward process that guarantees your device functions correctly and integrates seamlessly with your home network. Start by accessing the thermostat’s setup menu and selecting the Wi-Fi setup option. Ensure your home Wi-Fi network is active and within range. Follow the on-screen prompts to select your network and enter your Wi-Fi password. Once connected, you can customize your thermostat settings for ideal comfort and efficiency, known as thermostat customization. Adjust temperature schedules, set preferences, and enable any additional features offered by your device. Proper Wi-Fi setup ensures remote access and integration with smart home systems, so take your time to configure these settings accurately for a smooth and personalized experience.
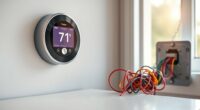
Testing and Finalizing Your Installation

Once you’ve completed the setup and connected your smart thermostat to Wi-Fi, it’s essential to verify the device to make sure everything functions correctly. Start by performing user interface testing to ensure the touchscreen or app controls respond smoothly. Next, check calibration procedures to confirm temperature readings are accurate. Then, test different settings like scheduling or eco modes to see if they activate properly. Finally, verify the thermostat communicates seamlessly with your HVAC system. If issues arise during testing, revisit calibration procedures or consult the user manual. Confirming these functions guarantees your thermostat operates reliably and efficiently. Once everything checks out, you’re ready to enjoy a comfortable, smart climate control experience.
Frequently Asked Questions
Can I Install a Smart Thermostat Myself Without Professional Help?
Yes, you can handle DIY installation, but it depends on your comfort level and the complexity of your system. You’ll need basic tool requirements like a screwdriver and a voltage tester. Carefully follow your thermostat’s instructions, turn off power to avoid shocks, and verify compatibility with your wiring. If you’re unsure or your wiring is complicated, it’s safer to seek professional help to avoid mistakes or damage.
What Should I Do if My Thermostat Wiring Is Incompatible?
Oh, so your thermostat wiring is throwing a tantrum and compatibility issues are the culprits? Time to stop playing DIY detective and call in the pros. While it’s tempting to tinker, incompatible wiring can damage your system or cause safety risks. Check your thermostat’s compatibility, consult your HVAC manual, or get an expert to assess the wiring. Trust me, a quick professional fix beats rewiring chaos.
How Do I Troubleshoot Connectivity Issues After Installation?
When troubleshooting Wi-Fi connectivity issues after installation, first check your Wi-Fi signal strength and guarantee your thermostat is within range of your router. Look for signal interference from other electronic devices that might disrupt the connection. Restart your router and thermostat, and guarantee your firmware is up to date. If problems persist, reset your thermostat’s network settings and reconnect it, making sure to select the correct Wi-Fi network.
Will Installing a Smart Thermostat Affect My Existing HVAC Warranty?
Did you know 85% of warranties stay valid after installing a smart thermostat? Installing one can sometimes impact your HVAC warranty, but it depends on manufacturer restrictions. You should review your warranty details or contact your provider to verify there are no warranty implications. Generally, if you follow proper installation procedures and use compatible devices, your warranty remains intact. Always check manufacturer restrictions before proceeding to avoid future issues.
How Often Should I Update the Firmware of My Smart Thermostat?
You should update your smart thermostat’s firmware as part of your maintenance schedule, ideally every few months or whenever a new update is available. Firmware updates improve functionality, security, and compatibility. Regularly checking for updates guarantees your device runs smoothly and stays protected from vulnerabilities. Don’t wait too long—staying current with firmware updates keeps your smart thermostat working efficiently and helps you get the most out of your smart home system.
Conclusion
Now that you’ve installed your smart thermostat, imagine saving up to 12% on heating and cooling costs annually. With your new device seamlessly integrated into your home, you’ll enjoy smarter energy use and greater comfort. Remember, proper installation not only boosts efficiency but also guarantees safety. So, take pride in your DIY achievement—your home is now smarter, more efficient, and ready for the future of climate control.