A poor installation choice can severely impact your mini split’s performance, causing uneven cooling, higher energy bills, and system failures. If the unit isn’t placed correctly, mounted properly, or airflow isn’t managed well, it can lead to reduced efficiency and a shorter lifespan. Mistakes like obstructed vents, improper wiring, or insecure mounting worsen these issues. Keep in mind, learning how to avoid these pitfalls will help you maximize your system’s longevity and effectiveness.
Key Takeaways
- Improper placement can cause uneven cooling, reducing comfort and increasing energy consumption.
- Poor airflow management leads to system strain, noise, and decreased efficiency.
- Incorrect mounting height or unsecured units can result in vibrations, leaks, and damage.
- Wrong wiring or refrigerant connections can cause system failures and costly repairs.
- Neglecting maintenance and obstructions impairs performance and shortens system lifespan.
Why Professional Installation Is Essential for Your Mini Split
While installing a mini split might seem straightforward, skipping professional help can lead to costly mistakes. A proper installation guarantees your system operates at peak energy efficiency, saving you money on energy bills. When done right, the installer optimizes airflow, refrigerant levels, and placement, which directly impacts performance and longevity. Without professional expertise, you risk poor sealing, incorrect wiring, or improper mounting, all of which can reduce efficiency and increase energy consumption. Proper installation also ensures adherence to enterprise governance standards, minimizing security risks and ensuring compliance. These mistakes not only diminish your mini split’s cooling or heating capacity but also lead to higher utility bills over time. Investing in professional installation guarantees your system runs smoothly, helping you achieve maximum cost savings and energy efficiency right from the start. Additionally, proper installation supports the broader goal of transforming finance with impact investing, as efficient systems contribute to sustainable energy use. Ensuring the system is correctly installed and maintained can also extend its lifespan, providing long-term benefits. Moreover, a professional installer can identify potential issues early, preventing future repairs and ensuring optimal performance throughout the system’s lifespan. Properly calibrated systems can also enhance overall efficiency and comfort.
How to Properly Place Your Mini Split for Maximum Efficiency

To get the best performance, place your mini split at the ideal height—usually high on the wall but below the ceiling. Make certain there’s plenty of clear airflow around the unit, avoiding obstructions like furniture or curtains. Proper placement guarantees efficient cooling and heating, saving you energy and money. Additionally, household organization tips can help ensure furniture and decor do not block airflow pathways. Being aware of DIY safety tips when installing or adjusting your unit can prevent accidents and help maintain optimal operation. Ensuring correct airflow management is essential for maximizing your mini split’s efficiency and longevity. Proper placement also involves considering smart furniture options that can support optimal airflow and accessibility. Paying attention to home safety principles during installation can further reduce risks and promote a safer environment.
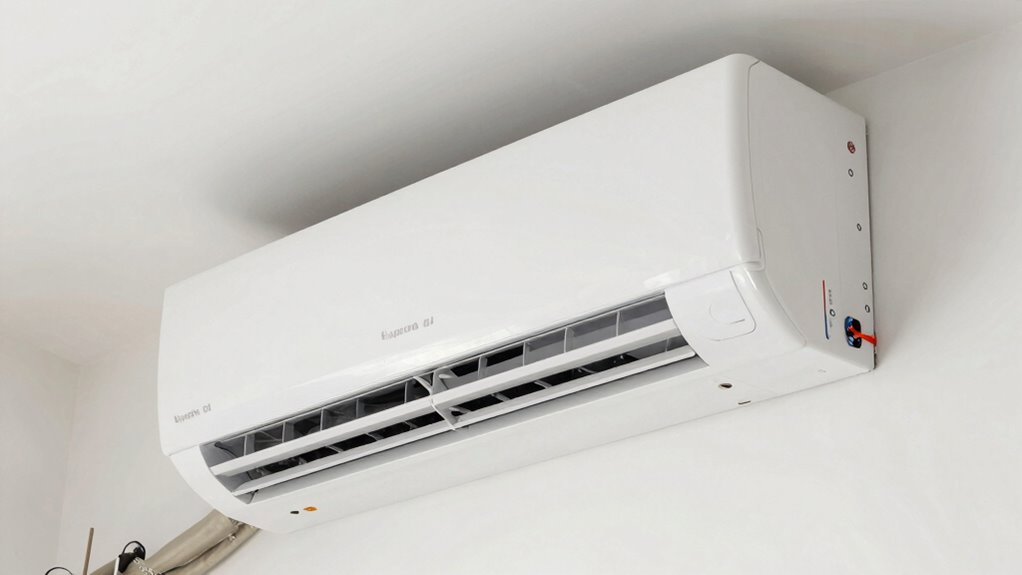
Optimal Placement Height
Placing your mini split at the right height is crucial for ideal performance. The perfect placement height ensures efficient airflow, which directly impacts heating and cooling effectiveness. Usually, the indoor unit should be installed high on the wall, about 7 to 8 feet from the floor, to promote airflow optimization. This height allows the conditioned air to circulate evenly throughout the room, preventing hot or cold spots. Avoid mounting it too high or too low, as this can disrupt airflow and reduce efficiency. Proper placement height also minimizes obstructions and maximizes comfort. Keep in mind that the right height helps your mini split operate smoothly, saving energy and extending its lifespan. Prioritize placement height during installation for the best overall performance. Ensuring your system is correctly installed can prevent filter failures and maximize efficiency. Additionally, understanding proper installation techniques can significantly influence the longevity and effectiveness of your mini split. Proper system design plays a vital role in maintaining optimal performance over time. A well-planned installation height can also help prevent airflow issues, ensuring consistent comfort throughout the space.
Clear Airflow Paths
Ensuring your mini split has clear airflow paths is key to maximizing its efficiency. Blocked airflow can cause airflow obstruction, reducing cooling or heating performance and increasing energy use. Make sure the unit isn’t placed near furniture, curtains, or other objects that could impede airflow. Regularly check for debris accumulation around the vents and ensure nothing is blocking the intake and output areas. Keep the area around the unit clean and free of dust, leaves, or dirt that could restrict airflow. Proper placement with unobstructed paths allows the air to circulate freely, improving comfort and reducing strain on the system. Maintaining clear airflow paths is simple but essential to keep your mini split operating at peak efficiency. Understanding regional flavors and pairings can also enhance your overall comfort experience when enjoying a cozy space. Additionally, performing routine appliance maintenance, like cleaning filters and inspecting vents, helps sustain optimal airflow and prolongs the lifespan of your mini split. Regularly inspecting your unit for airflow obstructions can prevent potential performance issues caused by debris or improper placement. Being aware of microchipping and ID options for pets can give peace of mind in case of emergencies, just as proper airflow management prevents system failures. Proper placement and regular checks are crucial for preventing performance issues caused by airflow restrictions.
Ensuring Correct Mounting and Airflow for Better Cooling
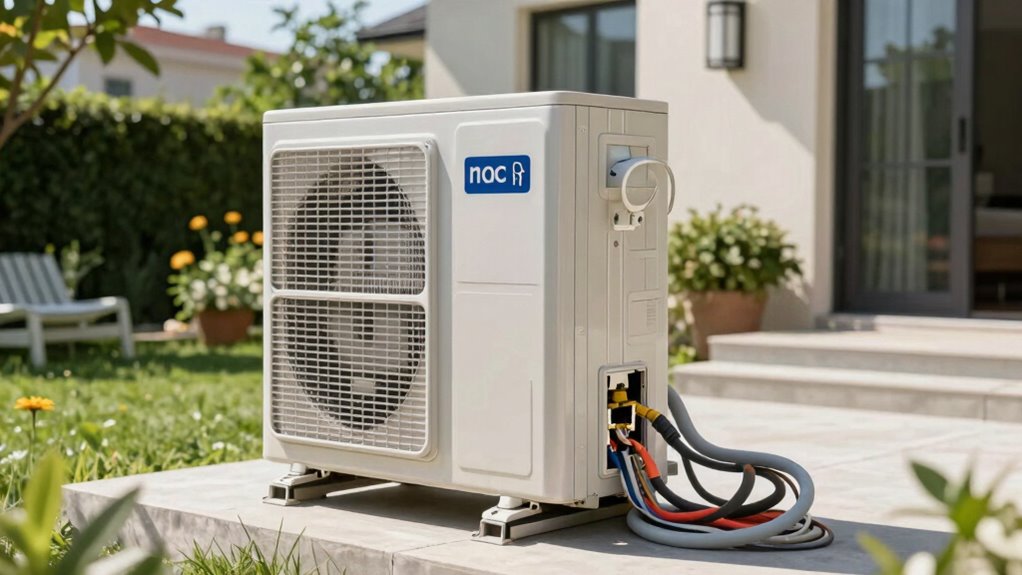
To guarantee your mini split cools effectively, you need to mount it correctly using proper techniques that keep it secure and level. Make certain there are clear airflow pathways around the unit by keeping the area free of obstructions and debris. Avoid placing anything that could block airflow, as this can considerably reduce cooling performance. Regularly inspecting and maintaining the unit can help ensure optimal airless paint spraying tips and gear and prevent airflow issues. Proper cabling solutions and secure mounting can also prevent vibrations and noise that might disrupt airflow and performance. Additionally, ensuring proper ventilation around the unit is crucial for safe and efficient operation, especially in enclosed spaces. Proper installation techniques are essential to prevent long-term issues and maintain optimal functionality. Using smart home safety devices like leak detectors and indoor air monitors can further enhance overall home safety and ensure your mini split operates in optimal conditions.
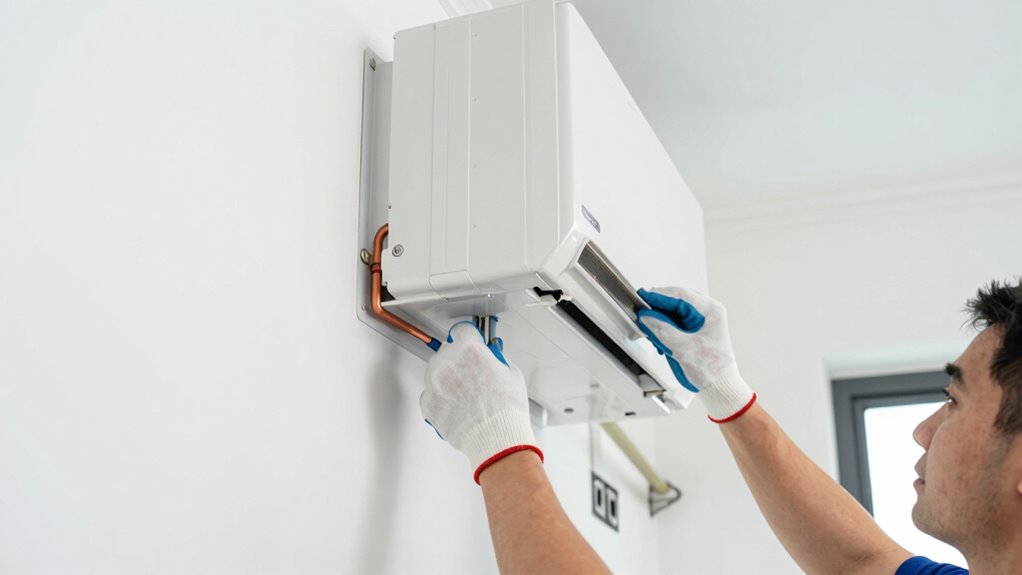
Proper Mounting Techniques
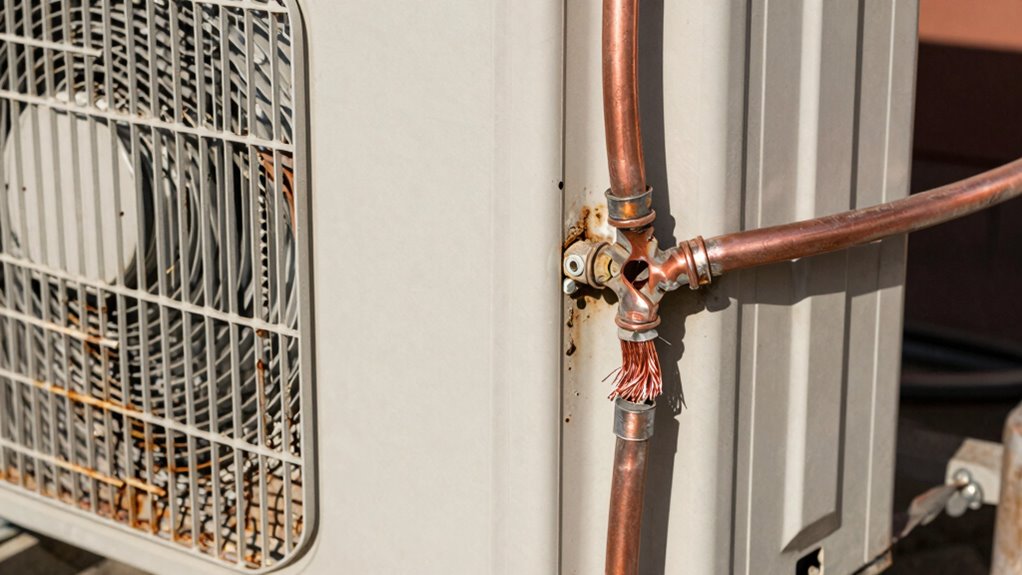
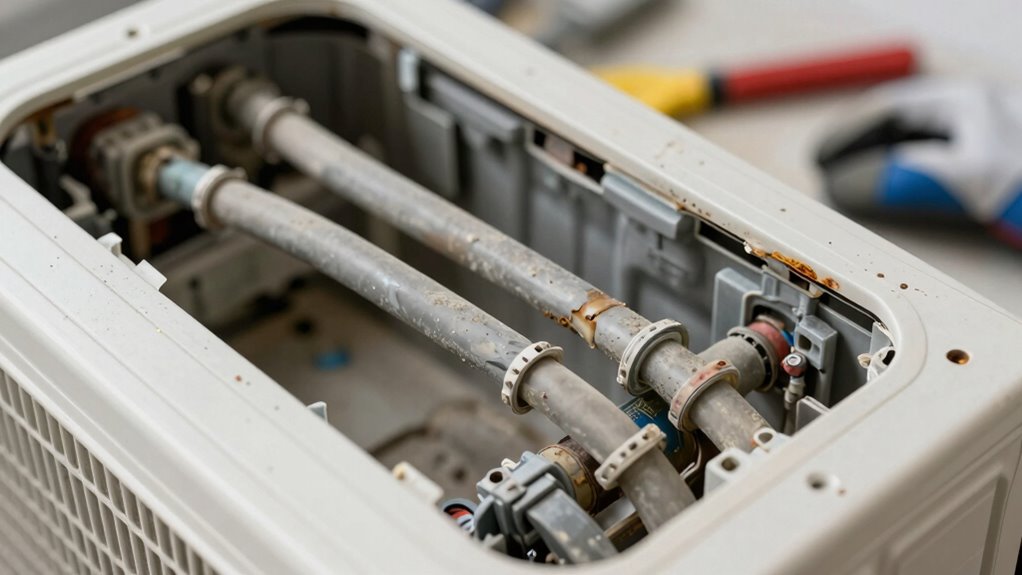
Proper mounting is vital for your mini split’s performance, as incorrect installation can hinder airflow and reduce cooling efficiency. When mounting the indoor unit, verify it’s level and securely attached to a sturdy surface. This helps maintain consistent indoor air circulation and prevents vibrations that can increase noise levels. Position the unit away from sources of heat, sunlight, or drafts to optimize indoor air quality and cooling performance. Proper clearance around the unit allows for better airflow, which is essential for efficient operation. Avoid blocking vents or placing the indoor unit too high or too low, as this can disrupt airflow and impact indoor air quality. Correct mounting guarantees quieter operation and better indoor air distribution, maximizing your mini split’s cooling potential.
Clear Airflow Pathways
A well-mounted indoor unit is the foundation for ideal airflow, but it’s equally important to assess pathways that allow air to circulate freely. If airflow obstruction occurs, your mini split can’t distribute cooled air effectively, reducing efficiency. Guarantee the unit is mounted with mounting stability, preventing shifts or vibrations that could cause blockages or misalignment. Proper positioning keeps the airflow pathways clear, allowing for smooth, even cooling across the room. Avoid installing the unit too close to furniture, curtains, or other obstructions that could hinder airflow. By prioritizing correct mounting and maintaining clear pathways, you help your mini split perform at its best, delivering consistent comfort while maintaining energy efficiency. Good airflow control starts with thoughtful placement and secure installation.
Avoid Obstructions and Debris
Ensuring your mini split remains free of obstructions and debris is crucial for ideal airflow and cooling performance. Blockages around the indoor air intake or exhaust can hinder airflow, making your system work harder and reducing efficiency. Clear away furniture, curtains, or any objects that could impede air circulation. Regularly clean filters and vents to prevent dust buildup that can affect indoor air quality. Proper mounting height and location help minimize noise, enhancing noise reduction and ensuring quiet operation. An unobstructed setup allows for smooth airflow, which improves cooling, lowers energy consumption, and maintains comfort. Keeping the area tidy and free of debris guarantees your mini split performs at its best, delivering consistent indoor air quality and effective cooling without unnecessary noise or strain.
Choosing Compatible Components for Your Mini Split System
Choosing compatible components for your mini split system is essential because mismatched parts can markedly reduce efficiency and performance. When selecting a condenser, evaporator, or control system, make sure they are designed to work together. Proper compatibility boosts energy efficiency, helping you save on utility bills and reducing environmental impact. Additionally, choosing the right components can improve noise reduction, making your space more comfortable. For example, pairing a high-quality compressor with a compatible indoor unit minimizes vibrations and noise. Always verify specifications and consult manufacturer recommendations to avoid mismatched parts that can cause system strain or failure. Investing time in choosing compatible components ensures your mini split operates smoothly, efficiently, and quietly, delivering ideal comfort for years to come.
Common Installation Mistakes That Can Ruin Your Mini Split’s Performance

Even the most compatible components won’t perform well if installed improperly. Common mistakes can considerably reduce energy efficiency and increase long-term costs. For example, improper placement leads to uneven cooling and higher energy use. Poor insulation around the lines causes leaks and inefficiencies. Over-tightening fittings or incorrect wiring can damage the system and reduce lifespan. Failing to clear obstructions or not securing the unit properly affects airflow. Here’s a quick overview:
| Mistake | Effect on Performance | Impact on Cost Savings |
|---|---|---|
| Incorrect placement | Reduced efficiency | Higher energy bills |
| Poor insulation | Leaks, inefficiency | Increased operational costs |
| Improper wiring | System failure | Costly repairs |
| Unsecured units | Poor airflow, noise | Reduced energy savings |
How to Spot Signs of Poor Mini Split Installation
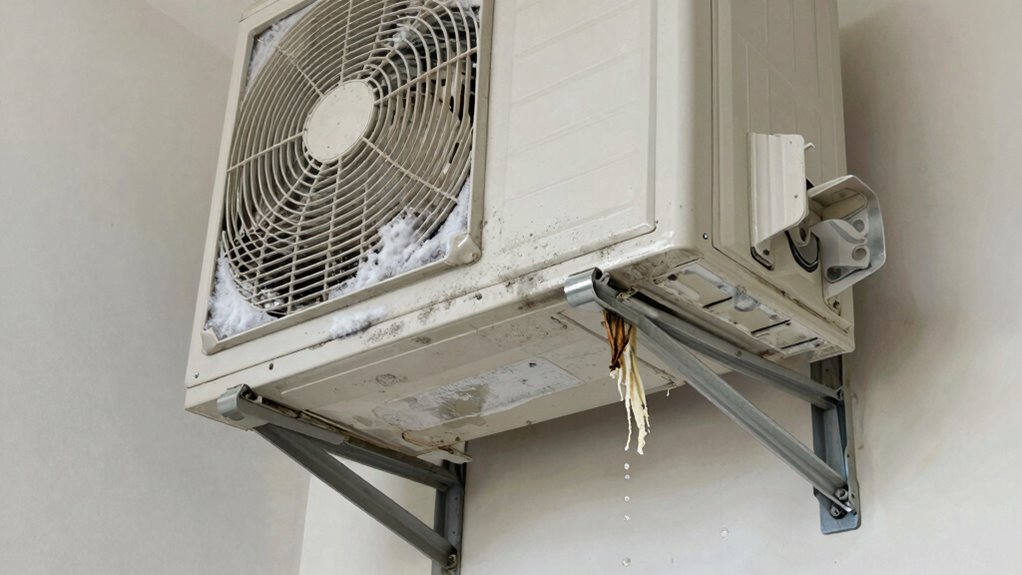
Poor installation can be hard to detect at first, but certain signs clearly indicate that your mini split isn’t performing as it should. If you notice uneven cooling or heating, it might be due to improper placement, which affects aesthetic enhancements and airflow. Excessive noise or vibrations often point to poor mounting or loose parts. Additionally, if your system struggles to maintain consistent temperature or seems to run constantly, energy efficiency is suffering, likely from improper sizing or poor insulation around the unit. Visual signs like leaks or ice buildup also signal installation issues. Pay attention to these signs, as they can compromise both the system’s performance and your comfort, highlighting the importance of correct installation for long-term efficiency and aesthetic appeal.
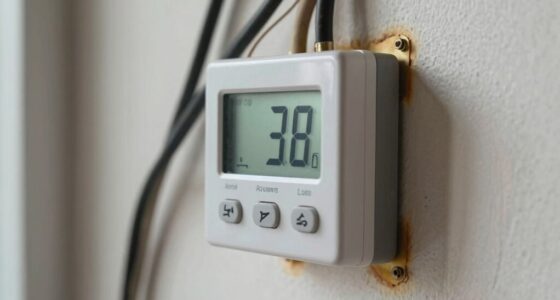
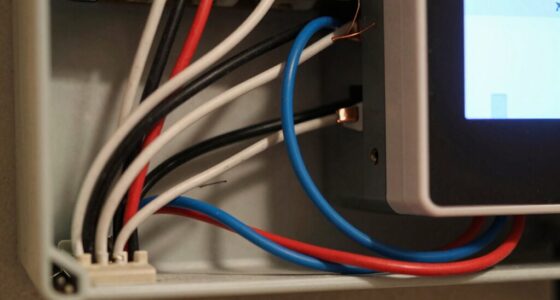
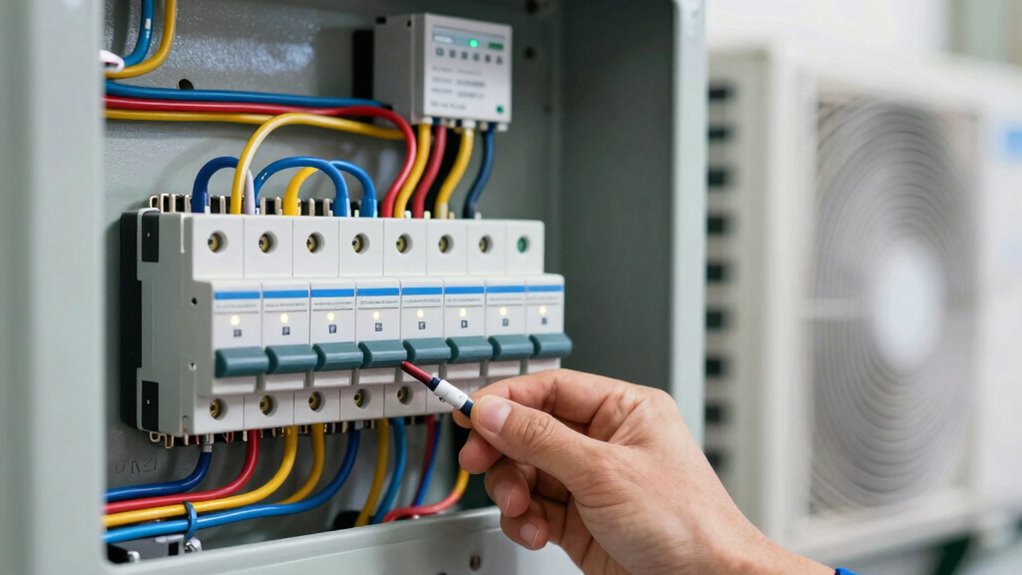
Proper Electrical Wiring Tips for Longevity and Safety
Proper electrical wiring plays a vital role in ensuring your mini split operates safely and lasts for years. To achieve this, focus on wiring accuracy and electrical safety.
- Use the correct gauge wire specified by the manufacturer to prevent overheating.
- Verify all connections are tight and secure to avoid shorts.
- Install circuit breakers that match the mini split’s electrical requirements for added safety.
- Keep wiring organized and away from moisture or debris to prevent damage.
Maintenance Tips to Keep Your Mini Split Running Smoothly
Regular maintenance is essential to keep your mini split running efficiently and prevent costly repairs. Start by using your remote control to adjust settings and monitor performance regularly. A simple maintenance checklist should include cleaning or replacing filters, inspecting the coils for dirt or debris, and checking for any unusual noises or leaks. Keep the air filters clean to guarantee proper airflow and cooling efficiency. Make it a habit to wipe down the exterior unit and clear any obstructions around the outdoor condenser. Regularly inspecting your mini split helps catch minor issues early, avoiding bigger problems down the line. Staying proactive with maintenance ensures your system operates smoothly, extends its lifespan, and keeps your space comfortable year-round.
How to Fix Poor Installation and When to Call a Professional
If you notice uneven cooling, strange noises, or leaks, your mini split may have installation errors. It’s important to recognize these signs early and understand when professional help is necessary. Calling in an expert can save you time and guarantee your system operates efficiently.
Identifying Installation Errors
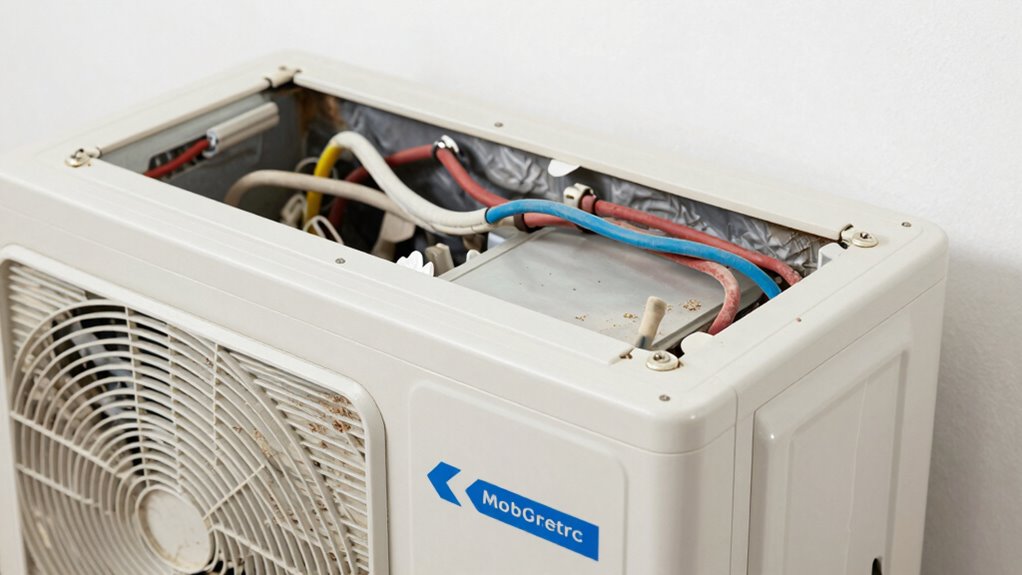
Installing a mini split system incorrectly can lead to a host of performance issues, so it’s crucial to recognize the signs of a faulty setup. Poor installation can reduce energy efficiency and increase noise levels. To identify errors:
- Check if the unit is vibrating or making unusual noise, indicating improper mounting or loose fittings.
- Ensure the refrigerant lines are correctly insulated; poor insulation hampers energy efficiency.
- Look for uneven airflow or temperature inconsistencies, often caused by incorrect placement or duct issues.
- Confirm the outdoor unit isn’t obstructed and is level, which impacts both noise reduction and system performance.
Address these issues promptly. If problems persist or you’re unsure, it’s best to call a professional to prevent further damage and guarantee proper operation.
When to Seek Expert Help
When you notice signs of installation errors—such as unusual noises, poor airflow, or refrigerant leaks—addressing the issue promptly can save you time and money. While some DIY hacks might seem tempting, attempting complex repairs often leads to more problems or voids warranties. Knowing when to call a professional ensures your mini split operates efficiently and safely. If you’re unsure about the cause of the issue or lack the proper tools, it’s better to rely on experts. Investing in professional help might seem costly upfront, but it can lead to significant cost savings over time by preventing further damage or performance issues. Ultimately, trusting licensed technicians guarantees proper installation fixes and maintains your system’s longevity and efficiency.
The Long-Term Benefits of Investing in Proper Mini Split Setup
Investing in a proper mini split setup pays off in the long run by ensuring peak performance and energy efficiency. When done right, you’ll experience significant benefits, including:
Proper mini split installation ensures long-term efficiency, comfort, and savings.
- Enhanced energy efficiency that reduces your monthly utility bills.
- Consistent comfort with reliable heating and cooling across your space.
- Lower maintenance costs due to correct installation and ideal operation.
- Long-term cost savings by avoiding frequent repairs or replacements caused by poor setup.
Frequently Asked Questions
Can DIY Installation Save Money Despite Potential Performance Risks?
Yes, DIY installation can save you money on upfront costs, offering significant cost savings. However, you must be cautious of installation pitfalls that could compromise your mini split’s performance. Poor setup might lead to inefficient cooling or heating, higher energy bills, and potential damage. If you’re confident and skilled, it’s worth trying, but weigh the risks carefully to avoid costly repairs or reduced system lifespan.
How Does Incorrect Refrigerant Charge Affect Mini Split Efficiency?
If you incorrect refrigerant charge, your mini split’s efficiency drops. Too little refrigerant causes refrigerant leakage, reducing cooling capacity and increasing energy use. Too much refrigerant puts extra strain on the compressor, leading to compressor strain and potential damage. Both situations make your system work harder, wasting energy and raising bills. To keep your mini split running smoothly and efficiently, guarantee the refrigerant charge is properly measured and maintained.
What Impact Does Poor Insulation Have on Mini Split Performance?
A stitch in time saves nine, and poor insulation greatly impacts your mini split’s performance. When insulation quality is low, you experience more energy loss, forcing the system to work harder to maintain your desired temperature. This not only raises your energy bills but also shortens the unit’s lifespan. To keep efficiency high and costs low, make sure your home is well-insulated, minimizing energy loss and optimizing your mini split’s operation.
Are There Specific Brands More Tolerant of Installation Errors?
Some brands are more tolerant of installation errors due to higher installation tolerance and better build quality. For instance, Daikin and Mitsubishi often offer reliable performance even if the installation isn’t perfect, thanks to their robust design and brand reliability. However, it’s still essential to follow proper installation guidelines. Remember, even tolerant brands can underperform or face issues if installation mistakes are too severe. Always prioritize correct setup for maximum results.
How Can I Test My Mini Split’s Performance After Installation?
To test your mini split’s performance after installation, start with a thorough installation checklist to guarantee all components are correctly set up. Then, run the system in both heating and cooling modes, checking for proper airflow, temperature changes, and unusual noises. Use performance troubleshooting tips, like verifying refrigerant levels and inspecting for leaks. Monitoring these aspects helps confirm your mini split operates efficiently and identifies potential issues early.
Conclusion
Investing in professional installation might seem costly upfront, but it’s worth it to guarantee your mini split performs reliably and efficiently. Don’t risk costly repairs or poor cooling due to a bad setup. Trust expert installers—they know how to avoid common mistakes and optimize your system. In the long run, proper installation saves you money, energy, and headaches. So, don’t cut corners—your comfort and system’s lifespan depend on it.