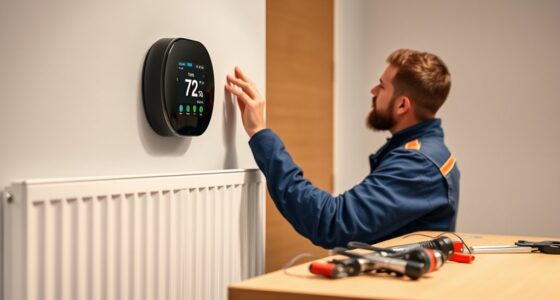

When wiring a smart thermostat, start by identifying the labels like R (power), C (common), W (heat), Y (cooling), and G (fan). Record these connections before disconnecting your old system, and follow the manufacturer’s instructions carefully. Ensuring each wire is securely attached and compatible with your system helps maintain reliable power and wireless functionality. If you want to learn more about proper wiring practices and troubleshooting tips, keep exploring for detailed guidance.
Key Takeaways
- Identify and record wire labels (R, C, W, Y, G) and terminal positions before disconnecting existing wires.
- Ensure compatibility with your system and check if a C wire or power extender kit is needed for continuous power.
- Follow manufacturer’s wiring diagrams carefully, securely attaching each wire to the correct terminal.
- Turn off breaker power before handling wiring to prevent electrical shocks and ensure safety.
- After wiring, restore power, then connect your thermostat to Wi-Fi, following setup instructions for wireless features.

Wiring a smart thermostat might seem intimidating, but with the right guidance, you can do it yourself quickly and safely. The first step is understanding the wiring labels and connections, which is vital for a successful installation. Many modern smart thermostats are compatible with wireless setups, allowing you to connect via Wi-Fi for remote control and smart features. Before starting, check your existing system to see if it supports wireless compatibility, which can simplify the installation process and reduce the need for extensive wiring. This way, you can focus more on the wiring labels and connections without worrying about cumbersome wiring.
Wiring a smart thermostat is simple with proper understanding of labels and wireless compatibility.
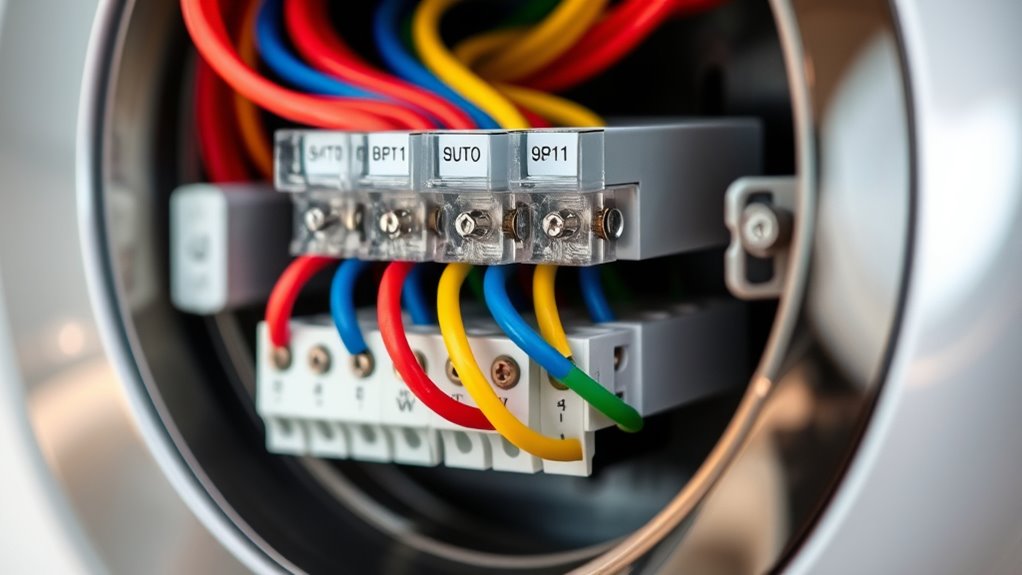
When you remove your old thermostat, take note of the wiring labels. Typically, wires are labeled with letters like R, C, W, Y, G, and sometimes others like O or B. These labels correspond to specific functions: R for power, C for common, W for heat, Y for cooling, and G for fan. Understanding these labels helps guarantee you connect everything correctly, preventing issues down the line. Use a smartphone camera or a notepad to record the wire labels and their positions before disconnecting them. This step is essential for cross-referencing during the new thermostat installation, especially if the wiring isn’t color-coded or if multiple wires are bundled together.
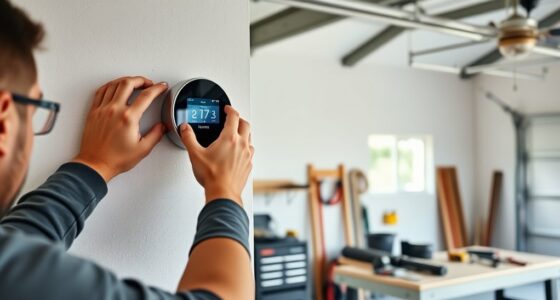
When installing your smart thermostat, follow the manufacturer’s installation tips closely. Many models come with detailed diagrams and instructions tailored to different wiring setups. If your system includes a C wire (common wire), it provides continuous power and tends to make the smart thermostat operate more reliably. If you lack a C wire, some thermostats can work without one, but you might need to use a power extender kit or consider a different model. Always turn off the power at the breaker before handling any wiring to avoid shocks or damage.
Once you’ve connected the wires to the corresponding terminals on your new thermostat, double-check each connection. Good contact ensures your smart thermostat functions correctly and maintains wireless compatibility, allowing for seamless integration with your smart home ecosystem. After wiring, restore power, and follow the setup instructions to connect the thermostat to your Wi-Fi network. Many models support installation tips like using signal extenders or placement advice to improve wireless connectivity. Making sure your thermostat has a strong Wi-Fi connection is key to enjoying all its remote features and smart capabilities. With patience and attention to detail, wiring your smart thermostat becomes a straightforward project that enhances your home’s comfort and energy efficiency.
Frequently Asked Questions
Can I Install a Smart Thermostat Without Professional Help?
Yes, you can do a DIY installation of a smart thermostat if you’re comfortable with basic wiring and follow instructions carefully. However, if you’re unsure about electrical work or your system’s wiring, it’s best to seek professional assistance. This guarantees safety and proper setup, avoiding potential damage or malfunctions. Always read the manufacturer’s guidelines thoroughly before attempting a DIY installation, and don’t hesitate to call a professional if needed.
How Do I Troubleshoot Connection Issues With My Smart Thermostat?
To troubleshoot connection issues with your smart thermostat, first check the wireless connectivity by ensuring it’s within range of your Wi-Fi router. Restart your router and thermostat to reset the connection. Confirm the power source is stable and properly connected, as a weak or interrupted power supply can cause issues. If problems persist, reconfigure the Wi-Fi settings in the thermostat’s app or reset your device to restore proper connection.
Are There Compatibility Concerns With Existing HVAC Systems?
You should check your HVAC compatibility before installing a smart thermostat. Some systems, like older models or certain heat pumps, might not work seamlessly with modern thermostats. Consider wiring considerations too, as different systems require specific wiring setups. If you’re unsure, consult your HVAC manual or a professional. Ensuring compatibility and proper wiring helps your smart thermostat function correctly and avoids costly issues later on.
What Safety Precautions Should I Follow During Installation?
During installation, prioritize electrical safety and wiring precautions. Turn off power at the breaker before starting to guarantee shocks are avoided. Use insulated tools and double-check wiring labels to make certain connections are correct. Avoid working in wet conditions and handle wires carefully to prevent short circuits. If unsure, consult a professional. Following these safety steps helps protect you and ensures your smart thermostat is installed correctly and safely.
How Do I Update the Firmware of My Smart Thermostat?
To update your smart thermostat’s firmware, first check for firmware updates in the device’s app or settings menu. Follow the prompts to download and install the latest version. Make certain your thermostat is compatible with the new firmware to avoid compatibility concerns. Keep your Wi-Fi connection steady during the update, and don’t turn off the device until the process completes. Regular updates ensure peak performance and security.
Conclusion
Wiring your smart thermostat might seem tricky at first, but with the right labels and connections, you’re all set. Did you know that installing a smart thermostat can save you up to 10-12% on heating and cooling costs annually? That’s a smart investment in comfort and savings. Just follow the labels carefully, double-check your connections, and enjoy the convenience of a smarter, more efficient home. Soon, you’ll wonder how you ever managed without it.